Slow Roasted Leg of Lamb & Alex’s Crème Brûlée


It’s Sunday night roast time at the Matla house and we’ve decided to go with a slow roasted rosemary and garlic leg of lamb.  Lamb is one of these dishes that need not be overly complicated.  In fact, the simpler the better.

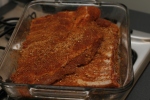
I picked up a 1.7kg bone in leg of lamb from the lads up at The Butcher this morning, brought it home and prepped the joint with fresh rosemary from the garden, 5 cloves of garlic, a good helping of extra virgin olive oil, Kosher salt and a good grinding of freshly ground pepper.

Simply take a sharp knife and make about 20 incisions deep enough to house a slice of garlic and a 1/2″ spring of fresh rosemary. The incisions should go around the joint and should be evenly spaced to allow for the maximum flavour penetration when you grill.  Now drizzle some extra virgin olive oil and season with Kosher Salt and freshly ground pepper. I then placed the joint in a dish and wrapped it with cling film.  Popped it into the fridge until about 35 minutes before grilling time!

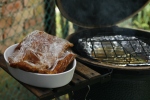
Set your grill up for direct heat at 300 degrees Fahrenheit however before you go on for the long haul, sear your joint on each side when the fire is nice and piping hot. This only takes a few minutes and then you can work your temperature down to 300 F and place your joint into a v-rack and a drip pan covered in alumunium  foil and then in the middle of the grate.  Let the magic happen (without peeking) for about 2 hours or until you reach an internal temperature of 140 degrees Fahrenheit.  Remove the joint and cover it with an aluminium foil tent for at least 10 minutes before you carve it up!

Along with the lamb, we served up some grilled vegetables, mint yoghurt and a triple herb infused flat bread. The grilled veggies included carrots, green pepper, yellow onions and whole garlic while the flat bread contained fresh thyme, rosemary and oregano from the front garden.  Yum!

Triple Herb Flatbread

  • 1½ tablespoons extra virgin olive oil
  • ½ cup warm water
  • 250g plain flour
  • ½ teaspoon salt
  • 1 tablespoon finely chopped fresh rosemary
  • 1 tablespoon finely chopped fresh thyme
  • 1 tablespoon finely chopped fresh oregano
  • 2 tablespoons butter, melted
Combine your olive oil and water separately and set aside. Process flour, salt and rosemary, thyme and oregano in a food processor. Slowly pour the olive oil and water mixture into the flour until the mixture forms a soft dough. Transfer the dough to a floured work surface and knead until smooth. Once done, place the dough into a bowl covered with a dry cloth and set aside for about 30 minutes.

To finish the flatbread, divide the dough into 12 equal pieces and shape each one into a ball. Roll out each ball on a floured work surface until they’re very thin. Heat a small cast iron pan over a medium heat and dry fry the bread for 3 minutes on each side until golden. Transfer the bread to a roasting dish lined with foil, brush with melted butter and keep warm in the oven until needed.

To top tonight’s feast, our son Alex insisted on making his own crème brûlée following the Food Network’s very own Alton Brown’s recipe. He’s really shaping up to be quite the cook at 13 and hopefully by the time he’s 21, he’ll be a natural in any kitchen!  Cheers and bon apetite!

Overall Heather Rating: 9/10

This slideshow requires JavaScript.

Cedar Planked Salmon with Garden Herb Pesto


So last night we had two salmon steaks for grilling and the challenge was to use as much from the home garden as possible to create something we’ve never done before. Personally I love a fresh pesto and so I went out and grabbed a big handful of parsley, similar amount of mint, 3 Kaffir limes and then I raided the pantry for olive oil, pine nuts, garlic, fresh ginger, salt and pepper.  That was pretty much it and it proved to be a simple and delicious meal.

To prep the pesto, simply combine the parsley, mint, lime juice, lime zest (from one lime), 4 cloves of garlic, 1 tbs fresh ginger and 3 tablespoons of extra virgin olive oil in your blender.  Whizzzzz it around until you get a really nice pesto consistency.  At this point I toasted up about 3 tablespoons of pine nuts and set them aside to cool  Once done, add them into the pesto mix and blast it twice to keep the pine nuts relatively coarse.


Whilst preparing everything, I soaked a cedar plank for about 2 hours.  We love the taste of cedar smoked salmon and I will try this recipe once again simply on the grill but for last night, we went with the smokey flavour of the cedar instead.

Prepare your plank by patting the top dry and then add your olive oil and a pinch of salt and pepper.  Place the salmon steaks on the plank and then use up about 2/3 of the pesto and coat each of the steaks.  Keep the last third for your plate.  Now I let these sit and come up to room temperature under a glass dish for about 30 minutes (that’s just enough time to let the salmon marinate nicely without staring to cook it with the acid of the lime.)


Set your grill to direct heat and stabilize at 400 degrees F. Place the plank and the salmon on the grill, shut the dome and let it rip for 20 minutes. That timing has always worked for us given the size of the steaks we purchase at the market.  Once done, slice the salmon and distribute evenly between your guests – in my case it was Heather, Alex and Kalyna (and a bit left over for me.)  Along with this dish I served up some basmati/onion rice and some steamed corn.

Hope you find this one as tasty as we all did!

This slideshow requires JavaScript.

Overall Heather Rating: 7/10

“I’d like S’more Please…”


I never ever feature other cooks or chefs on my blog, not because I don’t want to, but it’s more like we never have other cooks or chefs that grace us with their presence aside from Heather, Mayeth and/or Brett. OK, maybe I don’t want to share but..last night that all changed!

13 year old Alexander Paul Matla (yes, my son) decided to make his first dessert to celebrate his sister’s Permanent Resident status in Singapore.  The dessert? Chocolate S’more Pie…with all the trimmings! As a treat, I promised to share the spotlight and give Alex a well deserved top spot on our blog! Son, this one’s for you!

This is a three part recipe and you’ll need to prep your ingredients in these stages:

One:  The Crust:

  • 1 package of graham crackers
  • 5 tablespoons unsalted butter, melted
  • 1/4 cup sugar

Two: The Filling:

  • 2/3 cup sugar
  • 1/4 cup cornstarch
  • 1/2 teaspoon salt
  • 4 large egg yolks
  • 3 cups whole milk
  • 5 oz fine-quality bittersweet chocolate (not unsweetened), melted
  • 2 oz unsweetened chocolate, melted
  • 2 tablespoons unsalted butter, softened
  • 1 teaspoon vanilla

Three: The Topping:

  • 4 egg whites
  • Dash of salt
  • 7 oz. jar marshmallow creme

And now, this is all you have to do:

For the crust, preheat your oven to 350°F and place your rack in the middle of the oven.  Place your graham crackers into your trusty food processor and give them a good pulsing, until you’ve got a nice even texture worthy of a pie crust base. Combine your melted butter, graham crackers and sugar in a medium sized bowl and then once combined place it all in the bottom of a spring form pan. Try to pat it down evenly across the entire base.  Bake for 10-15 minutes  though Alex says he’d take it out at 10 minutes to cool rather than the 15.

Now lets move onto the filling! Whisk together your sugar, cornstarch, salt and egg yolks in a heavy saucepan until all the ingredients are fully combined. Next, add your milk in a stream whilst whisking constantly. Bring the mixture to a boil over a medium heat (whisking, whisking, whisking) and then bring down the temperature to a simmer. Whisk away until the filling becomes thick (a few minutes should suffice.)

Once thickened, force your mixture through a micro sieve into a mixing bowl.  Now the fun part.  Whisk in your melted chocolate, soft butter and vanilla.  Pure magic! Now let the mixture cool down properly before you spoon it into the pie mould (at least 2 hours.)  Once you do add the mixture, let the pie set for 4-6 hours before you prepare for the finale!

The topping goes something like this. Beat your egg whites and salt in your trusty mixer until you get soft peaks occurring. Gradually add your marshmallow creme until your start to see some hard peaks forming.  If you dare, stand underneath your meringue and see if any plops out.  If it does, it’s not ready!  (see photo below) Spread the meringue evenly over the set pie and create peaks.  Alex peaked with the back of a spoon, you can also use a spatula to create bigger peaks.

Now as all 13 year old boys love to do…it was time to torch the peaks to give the pie its final look and taste.  Carefully and evenly, torch the tips of the peaks until they become a lovely golden/darkish brown.  Any more and you’ll burn it!

Remove the spring side from the pan and serve up what can only be described as “One Yuuuuumy Pie!” Thanks Alex, that was not easy and it was absolutely delicious for your first attempt at a real dessert!

Overall Heather (and Dad) Rating: 10/10

This slideshow requires JavaScript.

She Cooks, He Cleans, We Eat!


Hello one and all and a special hello to Nancy and James who provided tonight’s recipe…Kofta Kebabs!

I was trolling around their excellent blog “She Cooks He Cleans” and thought oh my…we gotta give this a try!  So for this time, Nancy please forgive me for shamelessly stealing a wonderful recipe (originally found here) and allowing me to share it with my darling family!

I followed Nancy’s recipe to the letter however I did improvise the Ras-El-Hanout and we added aubergine and red peppers to the skewers along with a tasty spinach yogurt, carrot/pistachio salad  and rosemary flat bread.

Here’s the link for the sides recipe and prep: http://www.masterchef.com.au/skewered-meatballs-with-rosemary-flatbread-carrot-salad-and-spinach-yoghurt.htm

Its a bit of a lazy blog today however, we’ll be back later with Alex’s Permanent Residency Homemade Smore Pie, especially made for his new PR sister Kalyna!

Cheers!

Overall Heather Rating: 9/10

This slideshow requires JavaScript.

Reunited Family & Good Friends


So last night Heather and I had a few things to celebrate.  One, my son Alex returned home safely from a 9 week holiday across North America and two, we had a table full of friends who’s better halves were traveling on business and they all really needed a good home cooked meal and a game of Yahtzee.

It was a homecoming/take care of your buddies kind of night and on the menu was our infamous rib eye roast with Béarnaise sauce  (click here for the original recipe), roasted rosemary potatoes, crunchy beetroot and pear salad and a very special peanut butter cream pie (more on the pie later…)

It was also a special kind of evening in that Roman wasn’t snapping photos of every step, it was a dinner prepared with love (hence the iphone pics generously supplied by our friend Andrea!)

I did want to share the recipes for the sides and I’ll leave you a link for the peanut butter pie that will surely bring a tear to your eye…truth be told, Roman made the pie because of the story you’ll read.

The roasted potatoes:

  • 1 1/2 pounds small white-skinned potatoes
  • 1/8 cup olive oil
  • 3/4 teaspoon Kosher salt
  • 1/2 teaspoon freshly ground black pepper
  • 6 cloves minced garlic
  • 2 tablespoons minced fresh rosemary
  • 2 tablespoons minced fresh thyme

Preheat your oven to 400 degrees F and while that’s getting up to temperature pepare your tatties by cutting them into quarters.  Place them in a baking dish and heap on a generous slathering of good quality olive oil. To that, add your minced garlic, rosemary and thyme followed by a good seasoning of Kosher salt and freshly ground black pepper.

Place the dish into the oven and set your timer for 25 minutes.  At the sound of the tone, remove the potatoes and turn them over to ensure an even browning occurs. Pop them back in for another 25 minutes. Shake them around a bit once the timer pings and then reduce your temperature to a medium low for the next 10 minutes. You’re pretty much done at the 60 minute mark so get ready to plate up the roasted potatoes in a nice serving dish.

The Raw Beetroot & Pear salad:

  • 2 good-sized beetroots, scrubbed, peeled and cut into fine matchsticks
  • 2 ripe Chinese pears cut into matchsticks (leave the skin on…its delicious!)
  • 1 x lemon oil dressing (basically 1 part lemon to 2 parts olive oil and a bit of salt & pepper)
  • sea salt and freshly ground black pepper
  • 200g feta cheese
  • a small bunch of butter head lettuce leaves cut into bit sized pieces
  • a large handful of sunflower seeds
Combine all your ingredients in a large bowl and then crumble on the feta cheese and finally adding your lemon/oil dressing at the end.  For such a simple salad, you’ll freak out your guests with an awesome earthy taste. Who knew that raw beetroots could taste sooooo good?!?

Now, the final piece that made up last night’s meal is the Peanut Butter Cream Pie – please read the following post (click here) to find out why we chose to do this.  Thank you Jennie for your recipe and for sharing such a lovely tribute. It really made us appreciate the loved ones we had around the table last night!

This slideshow requires JavaScript.

“Fishzilla” aka Snakehead


Ok, so it’s not the prettiest looking fish in the world but it sure is tasty! Last night we grilled the legendary “Fishzilla” otherwise known as Snakehead or Channidae in Latin.

Lots of controversy surrounds this gilled menace.  In the US State of Maryland, it wreaked havoc on fresh water ecosystems by climbing swiftly to the top of the food chain (Nat Geo article) You’ve just gotta have some fish that’s as tough as that!

In Asia, the docile and fun loving snakehead is a bit of a delicacy in countries like Vietnam, Thailand, Singapore and Malaysia. Often found trudging around in filthy drainage ditches, the snakehead has progressed and is now commercially farmed across the region.  They were also the cheapest fillets I found at the fish monger the other week as well.  Right, that said we embarked on a reminder to this little fishy that WE are at the top of the food chain around here!

Preparing the fish:

  • 200g snakehead fish fillet, sliced thickly (2 fillets)
  • 5 teaspoons plain yoghurt
  • 3 teaspoons prawn paste
  • 1 teaspoon granulated sugar

Spicy Dipping Sauce:

  • 1 teaspoon prawn paste
  • 1 teaspoon granulated sugar
  • 1 tablespoon lime juice
  • 1 red chili padi, chopped

Fish Topping:

  • 1 tablespoon fresh dill
  • 2 stalks spring onion, cut thinly
  • 1 red chili padi, sliced
  • 1 tablespoon lime juice
  • 1 tablespoon roasted peanuts

The preparation for this dish is very easy and took less than half an hour from start to finish.  In fact, the basmati rice that I cooked up with this fish took longer.  Set your grill up for direct heat and stabilize the temperature at 400 degrees F.

Now while you’re waiting for the grill to settle, prepare your fish marinade by combining the yogurt, prawn paste and sugar in a bowl. Mix it well and ensure a nice creamy light brown consistency. From there you simply add your fish fillets to a zip top bag and then pour the marinade inside.  Squish it around a bit to ensure an even coating then let it sit f0r about 15 minutes.

You can also prep your dipping sauce ahead of time by simply combining the ingredients listed above and you’re done.

The fish goes directly on a lightly oiled grill for 7 minutes per side over medium heat.  Flip and check that your fish is cooking properly and leave it on a while longer if you think it’s not cooked through all the way.  Here’s a great little guide to use if you’re not sure about grilling fish: click here

OK, let’s assume that the fish has achieved a lovely golden brown apperance and is ready for serving.  Plate your fillets and then with a clean hand, top each fillet with the topping and then drizzle the remaining lime juice on top. Add some basmati rice to the side and you’re done.  Snakehead on a plate!

The result tonight was interesting.  Not the best fish we’ve ever grilled but certainly the most unique.  The texture of the snakehead was more like chicken though it kept all of its moisture.  The marinade really helped a lot and the red chili kicked up the heat factor.  All in all, a great and simple meal that we’d try again…perhaps with another white fish.

Overall Heather Rating: 7/10

This slideshow requires JavaScript.

A Hunters’ Feast: Venison Flanks


Venison! Plain, simple, lean and oh so tasty.  Last night my buddy Brett and I decided since our wives were still out of town on business, it was appropriate to grill something slightly different to bring in the weekend.

Curiously, I wonder if Heather and Barbara would dig on “Bambi?”  It hardly matters because after last night, there was none left to share!

The grilling experience included 5 exceedingly thin venison flank steaks, grilled spiced mushrooms, baked potatoes and a sesame inspired spinach salad. As we live in Singapore, the venison cuts came to us frozen (shudder) from New Zealand but truth be told, they weren’t bad at all. The aim was to have a really “Earthy” taste to dinner, the kind you’d prepare out in the wild if you could.

The preparation for this meal took far longer than actually cooking it.  So here are the instructions for at least two of the dishes served last night.

Grilled White Spiced Mushrooms

  • 1 teaspoon coriander seeds
  • 1 teaspoon cumin seeds
  • 2 tablespoons unsalted butter, softened
  • 1/4 cup coarsely chopped fresh flat-leaf parsley
  • 1 to 1 1/2 teaspoons dried hot red pepper flakes
  • 1 small garlic clove, minced
  • 1 1/2 lb medium white mushrooms (trimmed)
  • 1/4 cup olive oil
  • 1/2 teaspoon salt
  • 1/4 teaspoon black pepper

Over medium heat, toast your coriander and cumin seeds for two to three minutes or until they turn a darker brown and you really smell the aroma. Let the seeds cool down fully and then place them in your spice grinder or your mortar and pestle if you prefer.  Grind the seeds up into a fine powder and set aside. The smell is incredible, by the way! In a separate bowl, mash together your butter and your spice mix and add your parsley, chili flakes and garlic.

Toss your prepped mushrooms in some olive oil, Kosher salt and freshly ground pepper and place them on your oiled grill.  Now these “shrooms” will cook very quickly.  Pay attention here as you can easily walk away and let them burn.  I had the grill set at about 400 degrees F and the grilling time was about 6 minutes in total.  Using a pair of extra long tongs, I flipped the mushrooms a few times during the process to ensure they were cooked evenly, ensuring nice grill marks along the tops of each mushroom.

Once done, pull them off the grill and let them stand for a few minutes. You’ll quarter the mushrooms once they’ve cooled down a touch and then simply add them to your spiced butter and stir them around ensuring an even coating.

The Venison

We discussed the merits of using marinades and rubs the day before last and then decided that no, since this is a specialty cut of meat not normally found in Singapore, we’re going to let the venison’s natural flavour take centre stage.  That said, all I did was coat each flank steak with a bit of vegetable oil and then sprinkled each side with a good pinch of Kosher salt.  That’s it! I don’t think I’ve ever prepped a cut of meat any simpler!

As the steaks were super thin, they were on the grill for only 1.5 minutes per side and then another 30 seconds or so on the original side.  Pull off the steaks and wrap them in aluminium foil for a 5 minutes so that the juices redistribute throughout the steak.
Once ready, slice your venison flanks at a 45 degree angle to the grain and you’ll ensure the meat will be as tender as ever. Plate up with your spiced mushrooms, a baked potato and some salad, pour the wine and you’re ready for a hunter’s feast.

This slideshow requires JavaScript.

Overall Brett Rating (in Heather’s place): 9/10

The King’s Ribs: Memphis Style


Though born in Tupelo, Mississippi, the King moved to Memphis Tennessee with his family at the age of 13… Is this important?  Not in the least, however it does set the theme for today’s grilling episode…Elvis and all things Memphis! I’ve got a rib recipe for you that will make you curl your lip, shake your hips and say thank you, thank you very much!

As with all ribs, make sure you buy quality cuts.  Normally I’ll venture out to the West Coast market to pick up my pork from none other than the “pork lady” however today I wanted to go with quality baby back ribs and for that, I ventured up to see Pete and Jack at, you guessed it, the Butcher.

Now tonight’s dinner was tested by my pal Brett, the guy who usually tests our BBQ results.  Heather’s away so why not kick back with a buddy, have a few beers and slow cook some ribs!

Step one: The prep & rub using “Meathead’s Memphis Dust”

  • 3/4 cup firmly packed dark brown sugar
  • 3/4 cup white sugar
  • 1/2 cup paprika
  • 1/4 cup kosher salt
  • 1/4 cup garlic powder
  • 2 tablespoons ground black pepper
  • 2 tablespoons ground ginger powder
  • 2 tablespoons onion powder
  • 2 teaspoons rosemary powder

Mix it all up in a metal bowl and make sure you break up any chunks be it sugar, onion powder or anything else that may have formed into a tough clump.  This rub as it is yields about 3 cups worth of magic.  When you’re coating your ribs, you’ll only need about two tablespoons per side so you will have plenty left over to use again or to share.

When you’re ready to rub your ribs, make sure they’re prepped (ie have the silver skin removed and your ribs rinsed.) Apply a small bit of vegetable oil on each side of each slab as this will help with the rub absorption given the spice flavours are oil soluble as opposed to water soluble. Make sure you get an even coating and rub it in well.  I then wrap my ribs up in cling film and chuck them in the fridge for a few hours.  You can leave the rub on over night but a few hours will do for these ribs!

     
Step two: Gettin’ your grill on!

  • Set up your grill for indirect heat – no direct flame, just the heat from the coals!
  • Settle the temperature down to 225°F or 105°C
  • Add in your hardwood chunks; tonight I used mesquite chunks along with our quality hard wood charcoal
  • Get your v-rack ready on top of your drip pan set on top of the platesetter if you’re using a BGE
As Meathead puts it: “Cooking at 225°F will allow the meat to roast low and slow, liquefying the collagen in connective tissues and melting fats without getting the proteins knotted in a bunch. It’s a magic temp that creates silky texture, adds moisture, and keeps the meat tender.” I love the pure science behind this!

Step three: Have a few cold bevies and chill.  No peeking under the hood either!  Let the grill/smoker do it’s magic!

Step four: The Texas Crutch

A great way to ensure a moist and tender rib experience.  You’ll simply take the ribs off after 2.5 hours (for babybacks) and wrap them in aluminium foil with a splash (1/2 cup) of apple juice inside – or if your ribs fit, chuck them into an aluminium tin container and steep them together.  This method is called “boating” and is a lot easier and less of a faff. Crutch for no more than 30 minutes then return the ribs to the grill to crisp them up.

Step five: The Tennessee Whiskey Sauce (needs about 45 minutes prep time)

  • 2 cups Jack Daniel’s
  • 1 cup ketchup
  • 1 tablespoon lemon juice
  • 2 tablespoons Worcestershire sauce
  • 2 tablespoons malt vinegar
  • 4 tablespoons dark molasses
  • 1/2 teaspoon liquid smoke (optional)

Reduce one cup of whiskey in a saucepan by bringing it to a boil – careful not to flame the booze as you’re cooking!  Reduce the Jack to about 2 tablespoons’ worth. Add the rest of the ingredients now along with another half cup of Jack. Simmer this over a low heat for about 30 minutes – the sauce should reduce by about a third.  Once done you can slather up the ribs right away or put your new creation in a clean ketchup bottle to store for a few of weeks in the fridge.  So what do you do with the last half cup of Jack you ask?  SHOTS!


OK so now you’re ready.  The crutch is done and now place your ribs on the grid for another 10 minutes, five on each side.  Slather them up with your homemade Tennessee Whiskey Sauce and get them onto a plate to rest for about 5-10 minutes.  Serve them ribs up with some potato salad, courtesy of Mr. Brett Queen and voila…a perfect Sunday night dinner.

Overall Brett Rating (in Heather’s place): 8.5/10

This slideshow requires JavaScript.

Coconut Butt Chicken!


Sunday night dinner took a completely different turn last night.  I’d like to say that I came up with this one but I have to confess, it was down to our friends Naomi and Mo who quite thoughtfully gave me a book called “The Asian Barbecue Book” for my birthday.  In that book, there’s a recipe that stopped Heather in her tracks and so we had to try the Coconut Butt Chicken (though it’s officially called “Coconut Roast Chicken with Honey Glaze.”

A couple of things about this recipe before we dive in. First, as with all food, it’s really important to have the right and fresh ingredients on hand. As we live in Singapore, coconuts are more than plentiful. In fact, if our little daughter wasn’t restrained, she’d probably be able to climb the coconut tree in the front garden and pluck one for us right out of the tree.  Anyway, make sure that if you are trying this recipe out, get yourself a fresh coconut, preferably one that’s already been scalped and prepped for cooking.  In the supermarket here, they call them “ready to drink” coconuts.

Second, the grilling technique calls for indirect heat, that is, no flame, just convection heat from within the grill.  What I would strongly suggest is to wrap your chicken’s wings in aluminium foil along with the shoulders and breast.  The glaze on this chicken contains honey and coconut water – that is, its sweet and will burn very easily. Fortunately I managed to stave off some of the char by jumping in quickly but for next time, just wrap the bird and then remove the foil for the last 15 minutes of roasting.

Third, make more marinade than the book tells you, you’ll need it.  In this entry, I’ll give you three times the amount so that you can reserve 1/3 and use 2/3 on the bird.  Lastly, I would say marinate the chicken in the fridge for a couple of hours.  I followed the book and it only called for thirty minutes.  With such a wonderful glaze and marinade, go for a few hours if you can!

OK, on to the main event! Here are your ingredients:

  • 1 fresh coconut
  • 1 small onion thinly sliced into rings
  • 2 scallions, or green onions
  • 2 green jalapeno peppers, de-seeded and cut into thin slices
  • 1 whole chicken (cleaned and prepped)
  
For the marinade you’ll need:
  • 6 tablespoons of light soy sauce
  • 9 tablespoons of honey
  • 3 teaspoons of granulated sugar
  • 9 tablespoons of coconut water (I had an extra coconut)
  • 9 cloves of garlic, finely chopped or blended up in the food processor
  • 3 tablespoons of fresh old ginger, finely chopped or minced
  • 1.5 teaspoons of fresh black pepper
  • a healthy pinch of curry powder
Preparing the coconut (which replaces the can of beer in traditional beef butt chicken) you simply add in your onion rings, scallions and jalapeno peppers and stir it around with your finger.  I actually prepped my coconut about 3 hours in advance so that the water inside took on the spice of the pepper and onion.
Next, get your marinade ready and that simply combines the soy sauce, honey and sugar in a saucepan over medium heat. Once the sugar has dissolved, add in your coconut water, garlic, ginger, pepper and curry powder.  Let this simmer for about 10 minutes on a low heat then place it to the side and let it cool down to room temp.  Once done, reserve about a third of the marinade for basting.  I don’t like re-heating marinade that’s coated raw chicken.
You can marinate the chicken in a bowl or in a heavy-duty zip top bag, your choice.  Allow the chicken to sit in the marinade for a minimum of 30 minutes or what I would suggest is about 2 hours.  That way the ginger and coconut water really penetrate the chicken meat.
  

At this point, get your grill up to about 375-400 degrees F.  Wrap your chicken in foil or if you’re brave, you can do that after the first 10 minutes – this bird will burn quickly!  Reminds me of my dad when he comes to visit Singapore – gotta work on a quick tan!  Place the bird, sitting on the coconut over a drip pan and over indirect heat.  Close the dome and let it go for 1 hour and 20 minutes.  I happened to open the dome quite a few times to manage the burn.  Not to worry but if you are going to open your grill cover often, make sure you make up for it in lost time and heat.  Nothing worse than undercooked chicken!


In the last 10 minutes of your roast, baste the bird in the remaining clean marinade and you’ll see the beautiful colours that the glaze creates.  Crispy, sweet and subtle. At the 1 hour 20 minute mark, remove the chicken and wrap it in foil, preferably the same foil you used whilst on the grill.  Let that bird rest for about 10 minutes under the foil and a tea towel. This helps redistribute all the internal juices throughout the bird.
  
We served our coconut butt chicken with grilled aubergine and a bottle of red wine. No starches necessary for this light and perfectly summer type dish!  Hope it works for you as well as it worked for us! Cheers!

This slideshow requires JavaScript.

Overall Heather Rating: 7/10