
Hi loyal followers. I wanted to let you know that we’ve decided to retire BGAE and move it to a new site that’s more interactive and inclusive of all kamado and kamado-style cooking. You can find all your favourite recipes and updates on https://www.thekamadoclub.com. Come and check us out and follow the new adventures at TKC. Drop us a message and show you care!
Cheers!
Roman
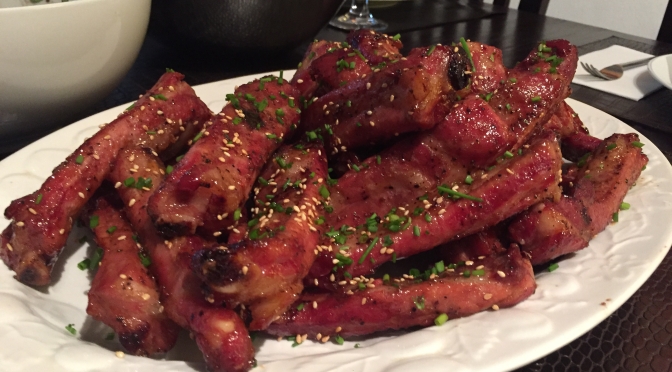
Asian-inspired Peanut Butter & Hoisin Ribs
Hello again from sunny Singapore! This weekend I was inspired to do something a little more akin to what the name of this blog suggests. Big Green ASIAN Egg… So I looked for a recipe to try out that was anything but standard.
Now you have to understand that our family are “rib connoisseurs” and when I suggest something new, eyebrows are raised as if to say, “if it isn’t broken, why fix it?” That’s the fun in trying something new.
So for the brave, here’s an Asian inspired recipe that will surely please your friends when you suggest going off topic!
What you’ll need:
- 2 racks of St Louis cut pork ribs – membrane removed
- 3/4 cups hoisin sauce
- 1/2 cup of crunchy peanut butter (we used Skippy)
- 1/2 plum sauce
- 1/4 cup oyster sauce
- 1/4 cup rice wine vinegar
- 1/4 cup dark soy sauce (the really thick kind!)
- 2 tbsp dark sesame oil
- 1 tbsp Thai chili sauce
- 5 cloves of garlic, finely minced
- 2 tbsp of finely minced old ginger
Combine by whisking the above ingredients, except for the ribs of course, in a medium sized glass bowl. You don’t want a reactive metal or a white plastic bowl as it will definitely stain.
Once done, reserve about 3 or 4 heaping spoons of the marinade for later. Leave it covered at room temperature. Now take your ribs, slice each rack in half and place them into a double bagged set of zip-top bags. You need to as the ribs are likely to punch a hole through the plastic. Having a second layer is just good insurance.
Spoon the thick, dark, tasty mixture into the bag and make sure you coats all sides of the ribs. Give it a good massage and then place the bags into a bowl and into the fridge. Normally I’d leave it overnight but alas I only had an hour before I had to put them on the grill. Still tasted amazing despite the hour long marination.
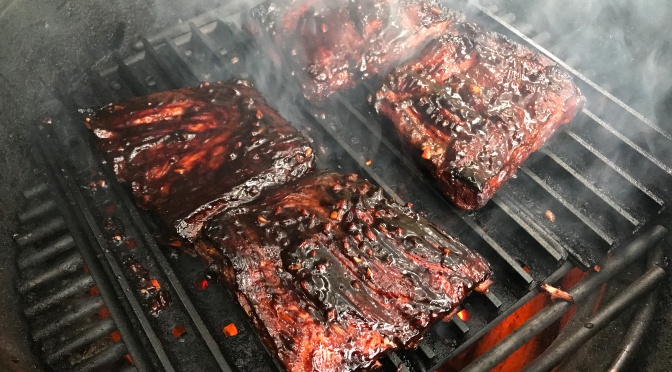
Set up your grill for indirect heat and place a water pan under the grid. This helps with catching the drippings but also provides a humid environment, leaving your ribs incredibly moist and juicy.
I used a handful of plum wood chips for this recipe. You can use anything you like but go easy on the smoke.
Remove the ribs from the bag and place them on a raised grill rack. All four will fit nicely. Set your ambient temperature to 225F (107C), place the ribs over the drip pan and close the lid. You’ll let these smoke for 2 hours.
Once done, carefully take the grill rack off the grid and wrap each rib section in a double layer of aluminium foil. I added a bit of apple juice to each packet for extra moisture during this stage. Now place the packets back onto the rack and back on the grid. Again, keeping a temperature of 225F (107C), close the lid and let them steep for 1 hour.
When the timer pings, remove the rack and carefully open each of the packets and place the ribs onto a place. Careful here as there’s a lot of steam and juices that will remain in the packet. Save that for basting! It’s ok to leave the ribs sitting uncovered for a while while you fire up the grill to SUPER HOT!
Using my trusty grill grates, I set the internal temperature up to about 500F (260C) for the final stage. When you’re ready, place the ribs meat side up onto the scorching hot grates. Keep your dome open during this stage as you don’t want the ribs to burn. Give the meaty side a baste with the marinade you set aside earlier. Keep flipping the ribs until you get a really nice char on both sides. Again, careful not to burn the sauce!
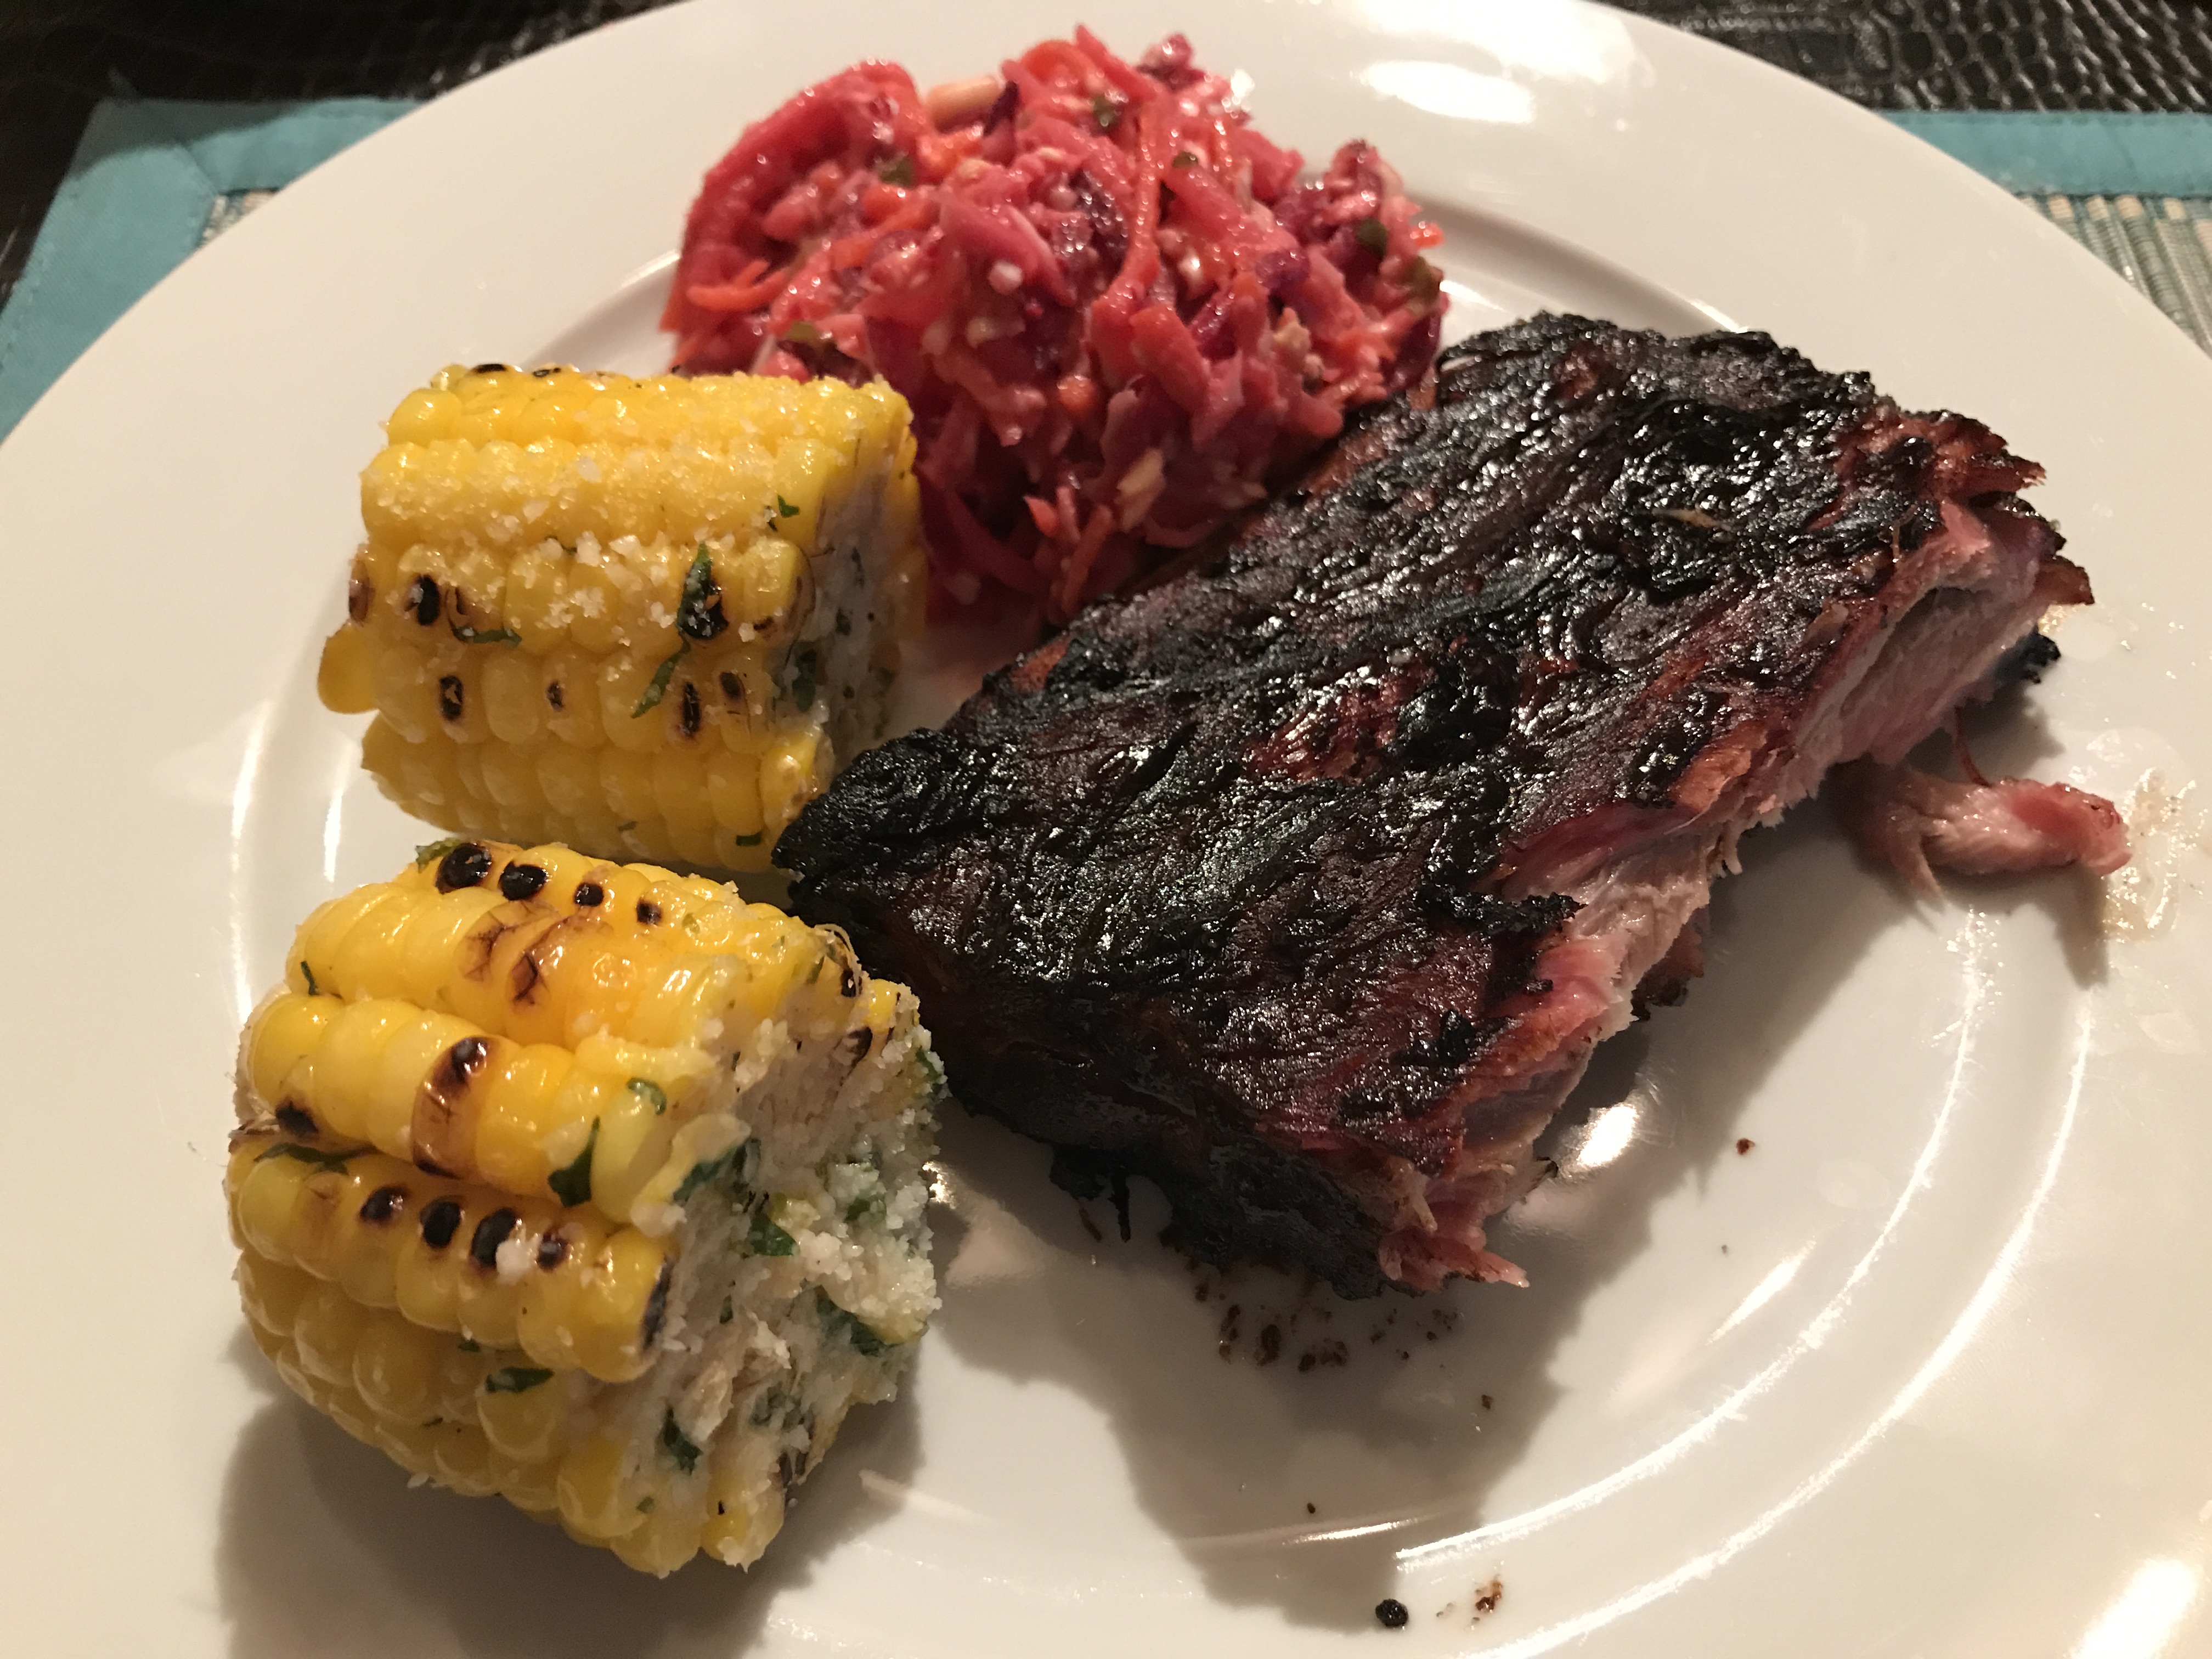
We served the ribs up with a radish, beetroot, carrot miso slaw and grilled corn with lime, mint, parmesan cheese.
The result was amazing! I got dinged on overall points because Heather ended up taking a fatty chunk of ribs. She’s not a fan of fatty ribs and neither should you! Not every rack of ribs will be award winning. Personally, I loved these ribs. They were juicy and super messy to eat. Great fun if you just don’t care about making a lip smacking mess!
Overall Heather Rating: 8.5/10
Veggie Burgers – Who Knew?
Who knew is right! Anyone who knows us is well aware that vegetarian dishes aren’t really our forte. I must admit I do love grilled/smoked meat but I wanted to try something challenging this past weekend so I found a great recipe for purely vegetarian burgers.
The beauty of this recipe is that it’s so simple its not funny. Its also a great dish to serve at your next backyard get-together for your friends and family that are more inclined to vegetarianism.
To serve 8 people, here’s what you’ll need insofar as ingredients go:
For your patties:
- 1 cup of cooked and chilled brown rice
- 2 (15 oz) cans of black beans, drained and rinsed
- 1/2 cup of your favourite bbq sauce – I used my KC sauce
- 1/2 cup of diced portobello mushrooms
- 1/2 cup of quick cook oats
- 4 tbsp of minced roasted beetroot – cool before you mince
- 4 tbsp of finely chopped soltanas
- 2 tbsp of minced garlic
- 2 tbsp of grated yellow onion
- 2 tsp of chili powder
- 2 tsp of smoked paprika (an awesome addition!)
- 2 tsp Kosher salt
- 1/2 tsp freshly ground cumin seeds
- 1/2 tsp freshly ground black pepper
For your glaze:
- 4 tbsp light soy sauce
- 4 tbsp hoisin sauce
- 2 tbsp molasses
The trick to making this super easy recipe is getting ready ahead of time. The term is called “mise en place” – click here for more info.
Once you’ve got all your ingredients ready, here’s what you’ll do. Using a medium sized bowl, simply mix everything for the patties in the order written above. Make sure you really squish the “mince” well to incorporate everything. It should look and feel like beef mince when you’re done. Once finished, pop the mixture into the fridge for about 15 minutes to allow it to set.
In the meantime, go make your glaze. Simply mix all three ingredients together and set it aside and leave it at room temperature.
When you’re ready to make your patties, measure out a ball of “v-meat” that’s about 100-125 g. I made my patties 200 g each and they were HUGE! Best to dial it back a smidge and make more patties. They don’t shrink at all (like meat does) so no need to make them too big. Line your patties up on a cooking sheet lined with grease proof paper.
At this point, put the patties back in the fridge or if you’re ready, get them on the grill!
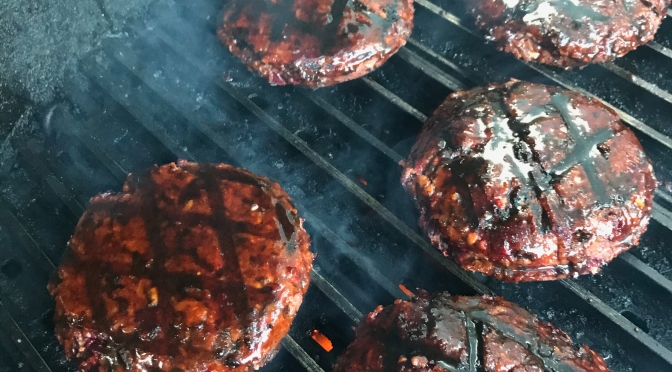
You should set up your grill for direct heat and aim for an internal grill temperature of 350F (177C). If you have grill grates, use them! They are amazing to use for this recipe and frankly for any recipe that calls for char marks. I through in a few plum wood chips for an added smokiness. Go easy on the smoke though!
Place your patties on the grill and close the dome. After 1.5 minutes gently turn the patties 45 degrees to get a nice diamond shaped char going. At the three minute mark, flip the burgers and repeat. Once you’ve flipped them, brush on the glaze that you made earlier.
After 6-8 minutes your burgers are pretty much done. They’ll be nicely heated through and the glaze will be nice and hot. Make sure you baste both sides of the patties.
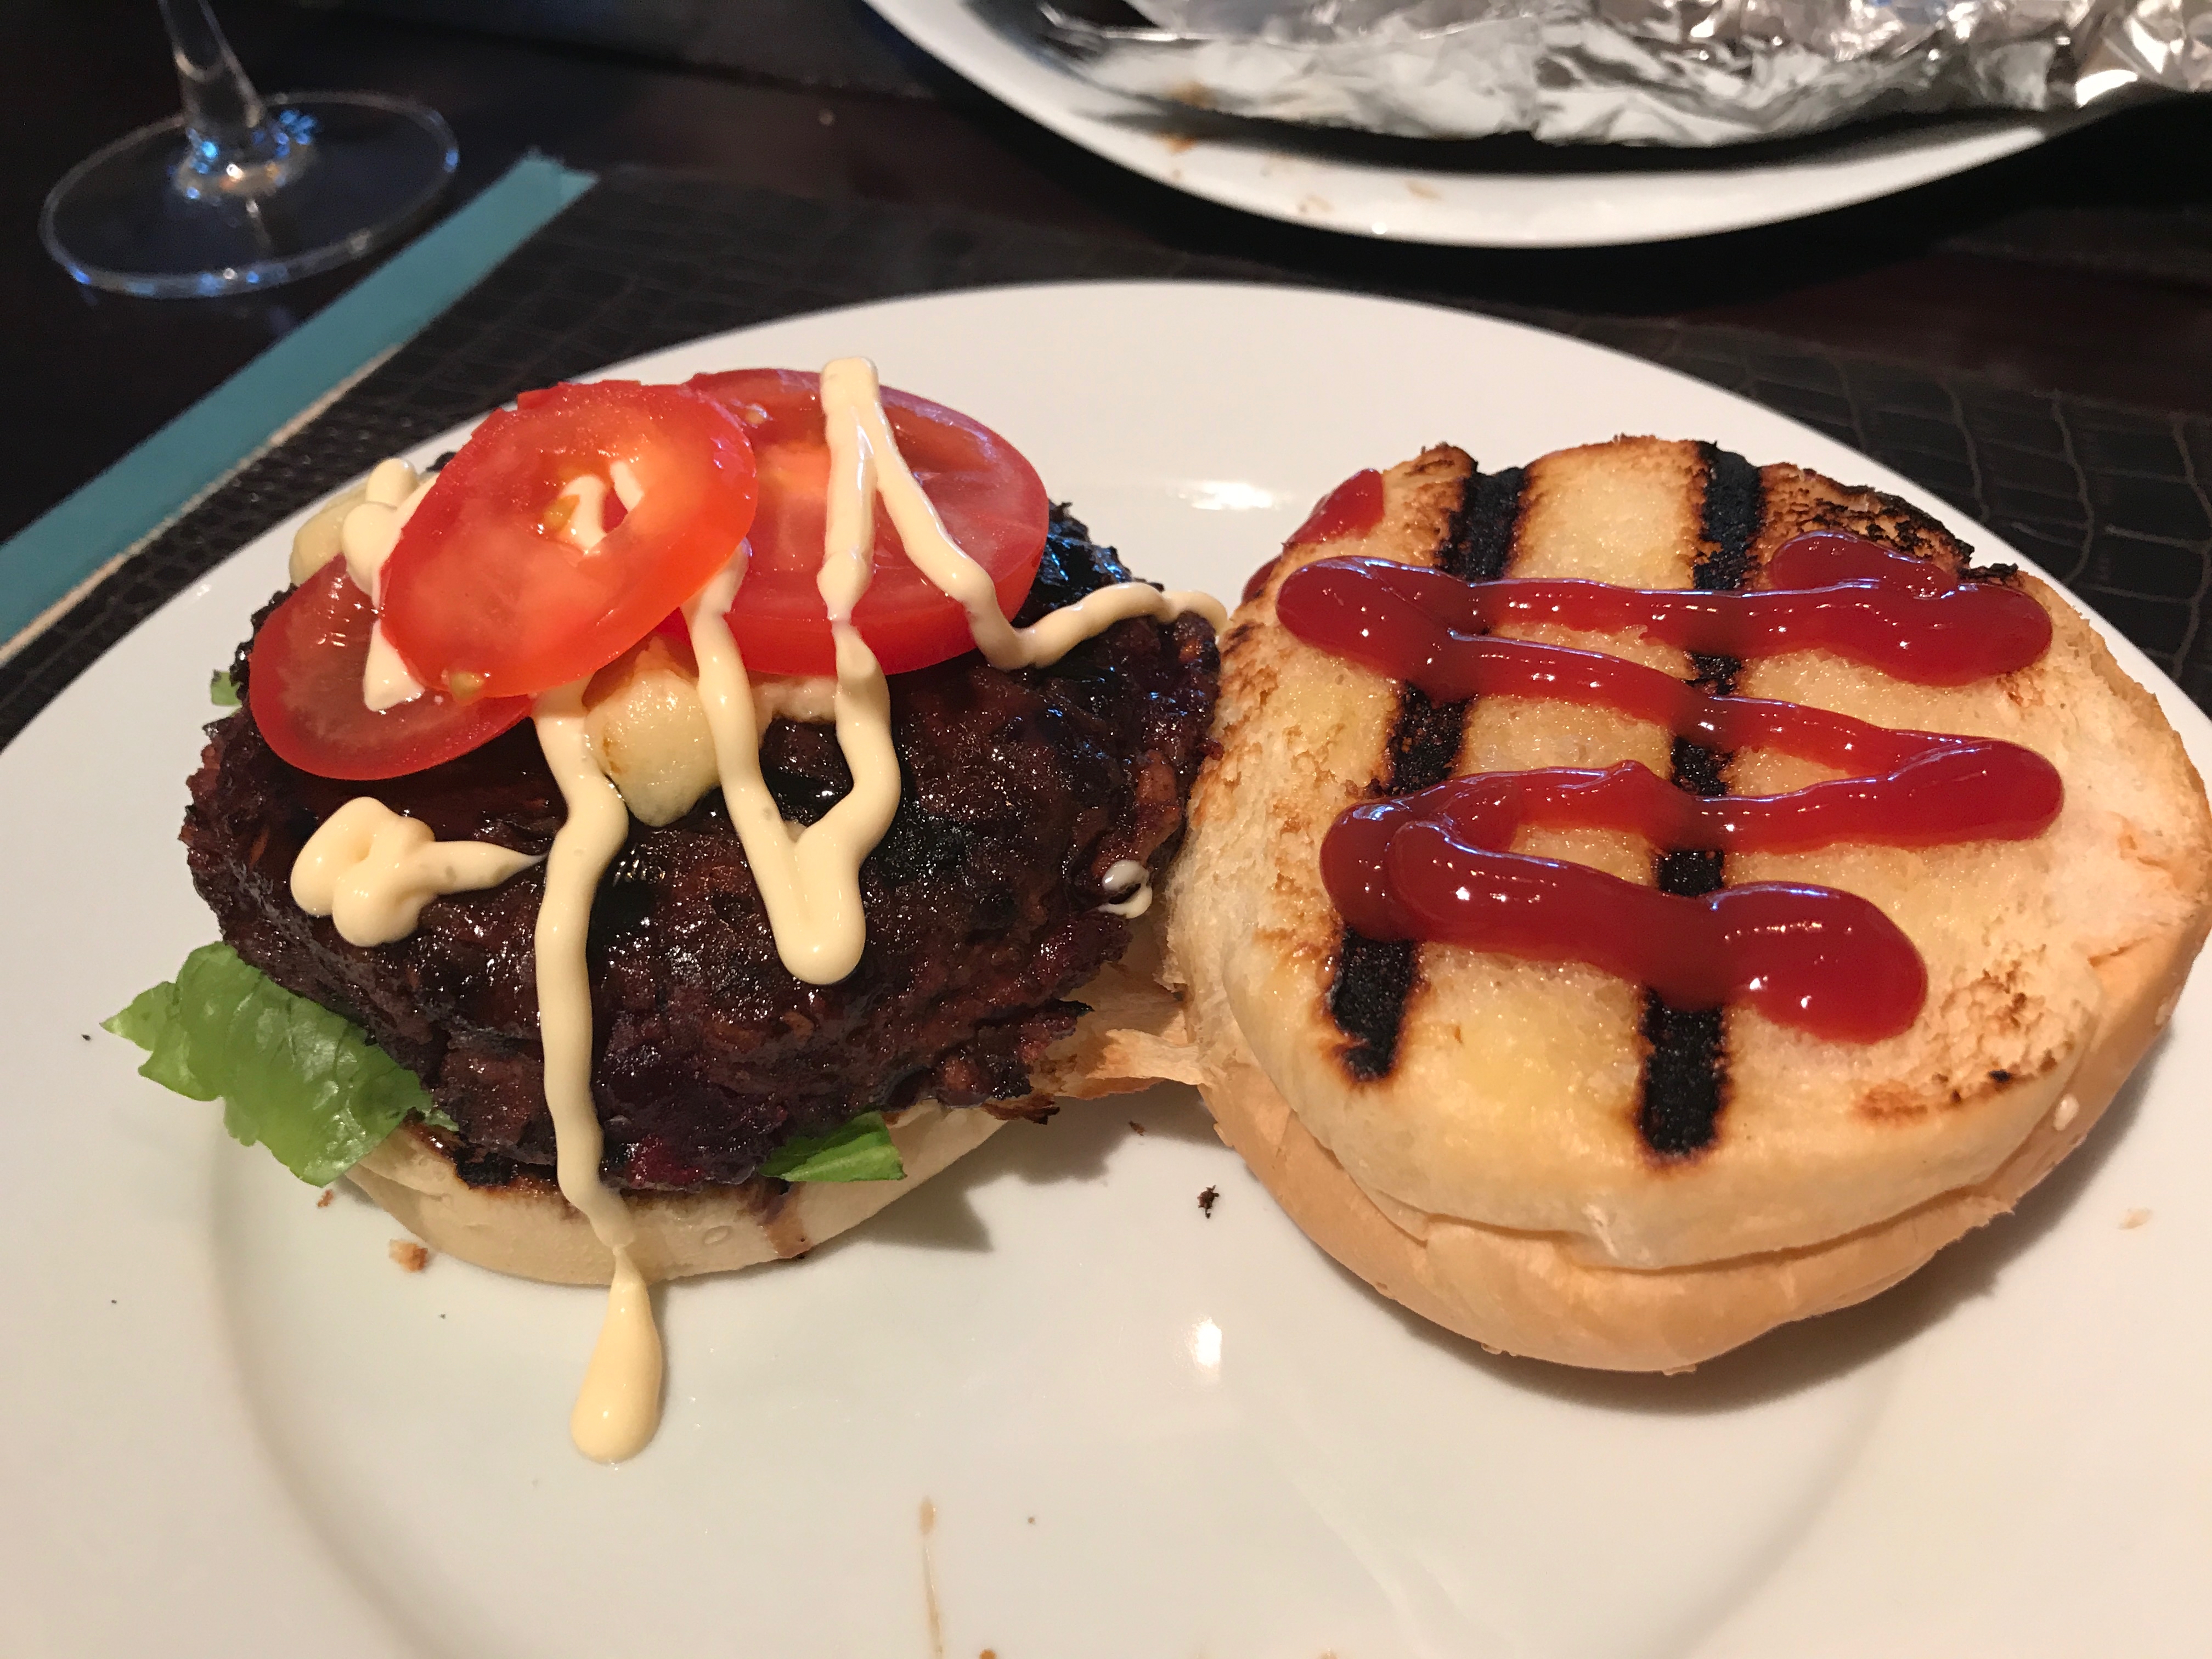
If you’re serving with buns, cut them leaving a bit of a hinge. Spread some room temperature butter or olive oil on them and put them on the hot grill for no more than 30 seconds to get a great set of char marks.
We served these burgers up with some lettuce, tomato and all the condiments we’d normally use on beef burgers.
So the result? AMAZING! I never thought in a million years that I’d actually say that! Our 6 year old daughter couldn’t believe these weren’t beef burgers! The soltanas, beetroot and rice really give it a similar texture to beef mince.
As an additional test I took a patty to work the next morning and shared it with some of my vegetarian colleagues. They helped validate the success of these burgers with rave reviews! Thanks Aparna, Vishal and Max!
Check out the process from start to finish with these photos:
Overall Heather Rating: 10/10 (“for a vegetable!“)
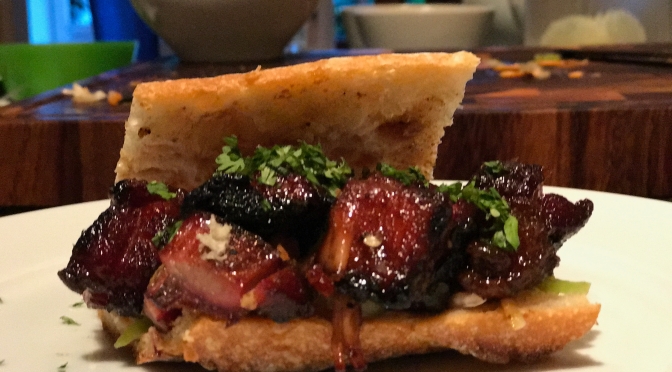
Smoked Pork Belly Burnt Ends – Bánh Mì
So first and foremost, my apologies for the prolonged absence on this page. In fact, I’m a day short of 1 year since my last post. Don’t judge me. It’s just that I find microblogging on FB is a lot easier and done from the phone. That said though, I woke up early this morning, eager to tell you all about a new recipe we tried yesterday. Pork belly ‘burnt ends’ Bánh Mì. Its a mouthful to say and write but boy what a mouthful of taste when you bite into one of these succulent Vietnamese style sandwiches.
Bánh mì (/ˈbɑːn ˌmiː/[1][2][3][4] or /ˈbæn ˌmiː/;[5][4] Vietnamese pronunciation: [ɓǎɲ mî]) is the Vietnamese word for bread. Bread, or more specifically the baguette, was introduced by the French during the colonial period in Vietnam.[6] The bread most commonly found in Vietnamese cuisine is a single-serving baguette that is usually airier than its Western counterpart, with a thinner crust. Unlike the traditional French baguette, the Vietnamese baguette is made with rice flour along with wheat flour (see rice bread).
In Vietnamese cuisine, bánh mì is typically made into a sandwich known as bánh mì kẹp or bánh mì Sài Gòn, eaten alongside dishes such as bò kho (a beef stew) and phá lấu, or dipped in condensed milk (see Sữa Ông Thọ). In the Western Hemisphere, especially in areas with substantial Vietnamese expatriate communities, the term bánh mì is used as a synecdoche for the sandwich, which is sold in Vietnamese bakeries.
This recipe hit my inbox about a week ago from our good friends over at Amazingribs.com. When I saw it, I said to Heather, this is a MUST DO and a MUST BLOG type of dish. Well, I wasn’t far off!
Here’s what you’ll need to make a simple but killer dish for your family and friends.
The protein:
- 1.5 kg pork belly, skin removed and sliced into 1.5″ cubes
The rub:
- 1 teaspoon five spice powder
- 1 teaspoon ginger powder
- 2 tablespoon brown sugar
- 2 teaspoon Kosher salt
- 1 teaspoon ground black pepper
Quick Pickled Vegetables
- 1/4 cup unseasoned rice wine vinegar
- 1/4 cup water
- 1/4 teaspoon Kosher salt
- 3 tablespoon white sugar
- 1/2 cup radishes cut into matchsticks
- 1/2 cup carrots, peeled and cut into matchsticks
- 1/2 red onion, thinly sliced
Special sauce:
- 1/2 cup mayonnaise
- 1/4 teaspoon sesame oil
- 1/4 teaspoon soy sauce
The glaze:
- 1/3 cup high quality honey
- 1 tablespoon light soy sauce
- 1 tablespoon rice wine vinegar
- 1/2 teaspoon hot sauce (pick your favourite one)
The bread and garnish
- 24″ baguette cut into 6″ lengths
- 2 thin sliced green jalapeno peppers
- 1/4 cup cilantro – chopped
- 6″ of thinly sliced cucumber
- 1/2 cup shredded cabbage
Start by trimming off all the skin from your pork belly. I got mine at NTUC Fair Price in Boon Lay and it was about $4.90 for a packet of 4-5 slices. Save the skin and fry it up later to make some pork crackling…goes great with a cold beer on a hot day.
Once you’ve taken the skin off, trim the pieces to make 1.5″ cubes, If you’re dealing with a whole belly, take a sharp knife and carefully cube it all up.
Mix the rub together and coat your pork belly cubes liberally. You don’t need to oil them but do get them a bit wet with a bit of water. The rub will stick better. Once coated, place the cubes onto a rack and get them ready for smoking.
Set up your smoker (or grill) for indirect heat at 225F (about 107C). Just before you’re ready to smoke, chuck on about two fist-fulls of wood. I used plumb this time around and it’s subtlety was amazing!
Now place your pork belly onto the smoker and set your timer for an hour. Once it pings, simply rotate the rack and let it smoke for one more hour. In the meantime you can prepare your sauce and put it in the fridge. You can also make the glaze and leave that covered at room temperature.
The quick pickled vegetables are super simple to make and taste amazing with the pork belly burnt ends. Simply julienne the carrot and radish and thinly slice up the red onion. In a medium pan, bring the water, vinegar, salt and sugar to a boil. Once done, take it off the heat and place the vegetables into the pot, cover it and let it steep for 30 minutes. Let it cool and transfer the veg to a bowl and refrigerate.
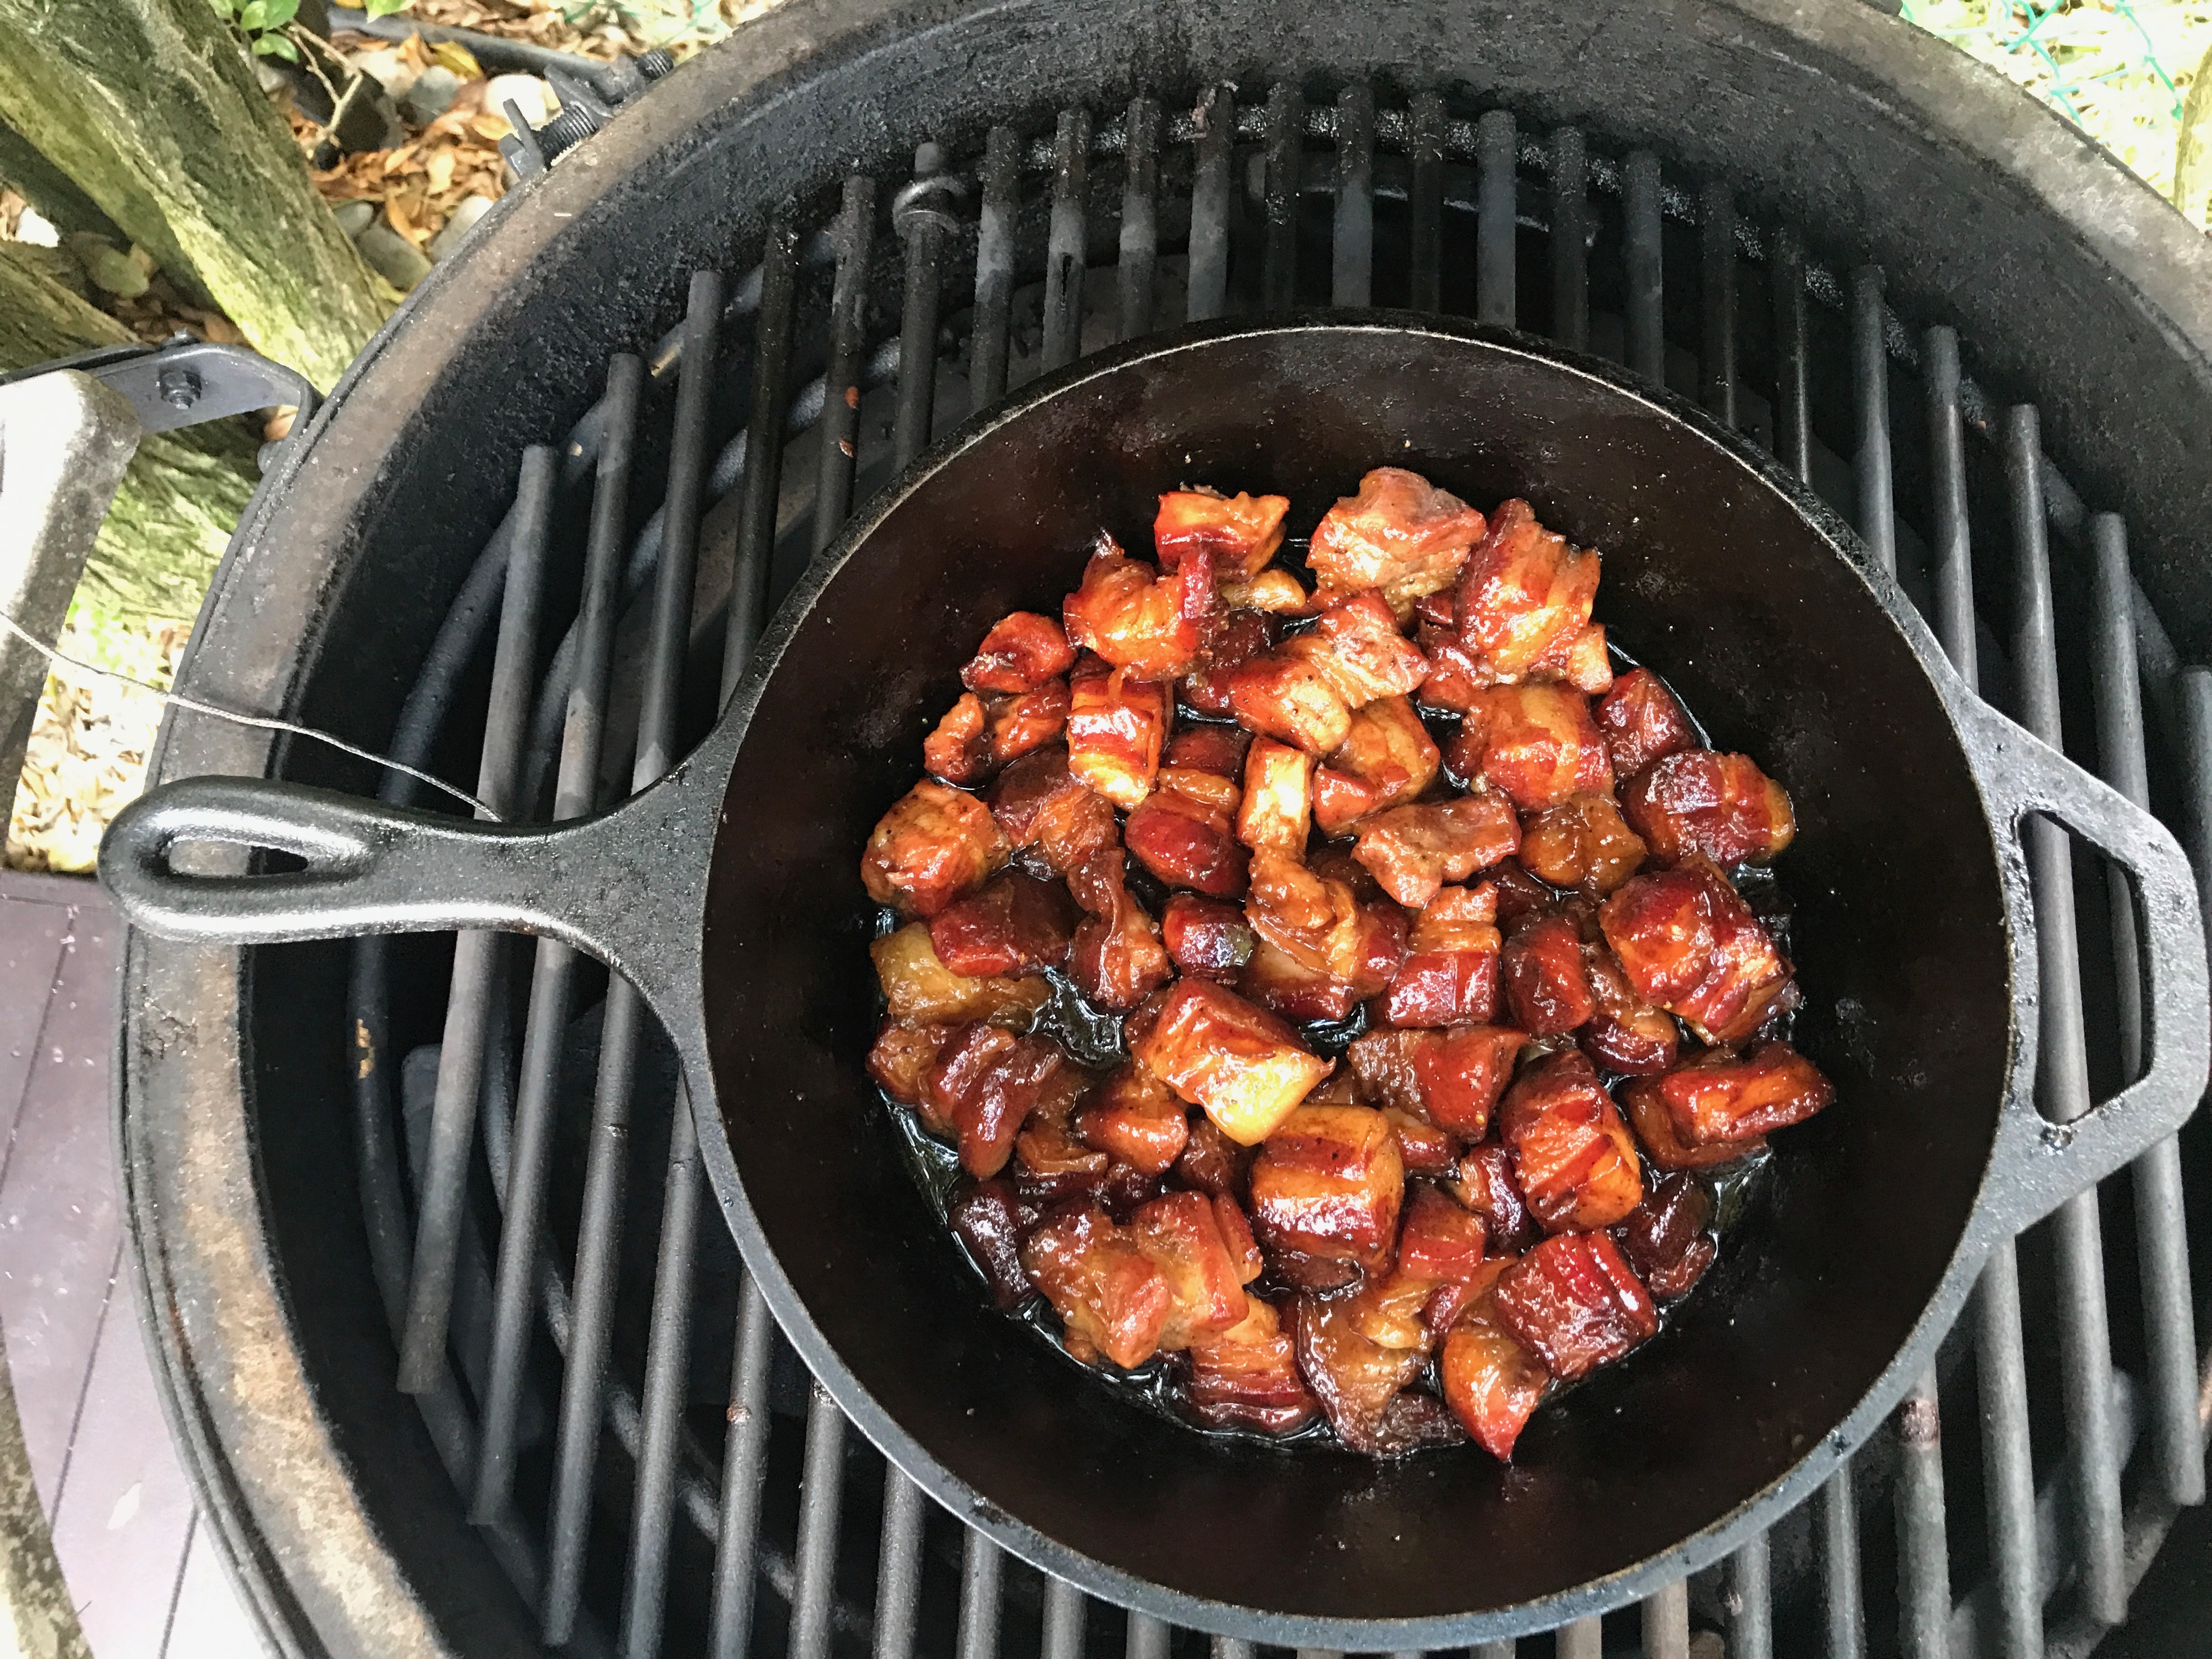
So, two hours have gone by now. Carefully remove the rack containing all the pork belly cubes and transfer them to a dutch oven or a aluminium tray. I love to use my cast iron gear when I can and I prefer it to wasting alumimium trays. Pour the glaze all over the pork belly cubes and make sure you coat them thoroughly. Give them a good stir. I then put an extra two layers of aluminium foil over the dutch oven followed by the lid. Let that steep for 90 minutes.
So now the pork belly cubes are starting to look more like burnt ends. One last step but it’s a tricky one is to crisp up the cubes. Take the dutch oven off the grill and set up for direct heat but use grill grates if you have them. They are essential when doing work like this because you’ll never lose a piece of belly to the roaring flames below. Trust me, you want every scrap of pork.
Remove the cubes from the dutch oven but keep all that amazing glaze in there. You’ll drop the cubes back in once they’re crispy. Once you’ve got a hot grill ready, place the cubes on top and keep the dome of your grill open. Move the cubes around for about 15 minutes ensuring you don’t burn them. All that hard work could easily go to waste if you’re not careful here.
Once crispy, put the cubes back into the glaze and give them a final coating. Slice your baguette lengthwise leaving a hinge. Smear the mayo-sauce then load of some shredded cabbage, cucumber slices and the pickled vegetables. Now load up your pork belly burnt ends and sprinkle with chopped cilantro and jalapeno peppers.
Prepare to be amazed! Bite into that sandwich and you’ll experience and explosion of flavour that has no equal. Enjoy this great recipe and please let me know how you get on with it.
Overall Heather Rating: 11/10
Chuck ‘n lamb cheeseburgers
Hi there folks! Yesterday I tried something I’ve been meaning to do for ages, and that was to make burgers from absolute scratch. No pre-purchased mince, just animal parts and a grinder. The result? Amazing flavour, incredible consistency and most importantly, no wastage!
This all started with lamb that I was prepping for the next day. Trim off all the fat you need to and take the trimmings – not the silver skin – and run it through a course grinder. You need a good piece of machinery to do this right. We use a sturdy Kitchen-aid more than anything. Set the fat aside in the fridge. Go and wash the grinder and parts thoroughly.
Now get approximately 2.5 kg of beef chuck. The chuck is found above the brisket (pectoral muscle) of a cow. It’s the muscle cows use to throw things like basketballs and frisbees, not really but stranger things have happened.
 Trim off any silver skin and cube the chuck into pieces that are small enough to drop into your grinder feeder. Grind it up and get your lamb fat out of the fridge because now you combine.
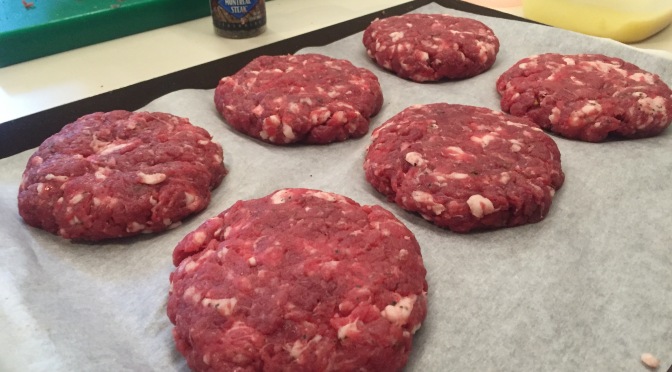
Chuck is very lean meat so you need some extra fat to give it a flavour boost and to help bind it and not make it rubbery. You want a rough ratio of 80:20 chuck to fat. You can use beef fat, suet, streaky bacon or as I did, lamb fat. Using a digital scale I took 500 g of beef and 100 g of lamb fat and combined the two in a metal bowl. Once combined I seasoned the mince with a hearty helping of Montreal steak seasoning and some kosher salt. Grab a handful and measure out about 150 g for each patty. Form your patties and place them on a baking sheet lined with non-stick baking paper. Repeat the process three times to yield 12 hearty-sized patties. Now put them all back into the fridge to help them firm up. At this point, go light your grill.
Set up your grill for about 450F – nice and hot. I used my trusty grill grates (a must have) to get a nice sear and the deep grooves allow for easy flipping.
Put the burgers on and close the lid for 3 minutes then CAREFULLY open the lid allowing for a burp minimizing the chance of a massive fireball. Turn the burgers one quarter to left or right, this gets the nice diamond sear pattern. At five minutes flip the burgers and repeat the process.
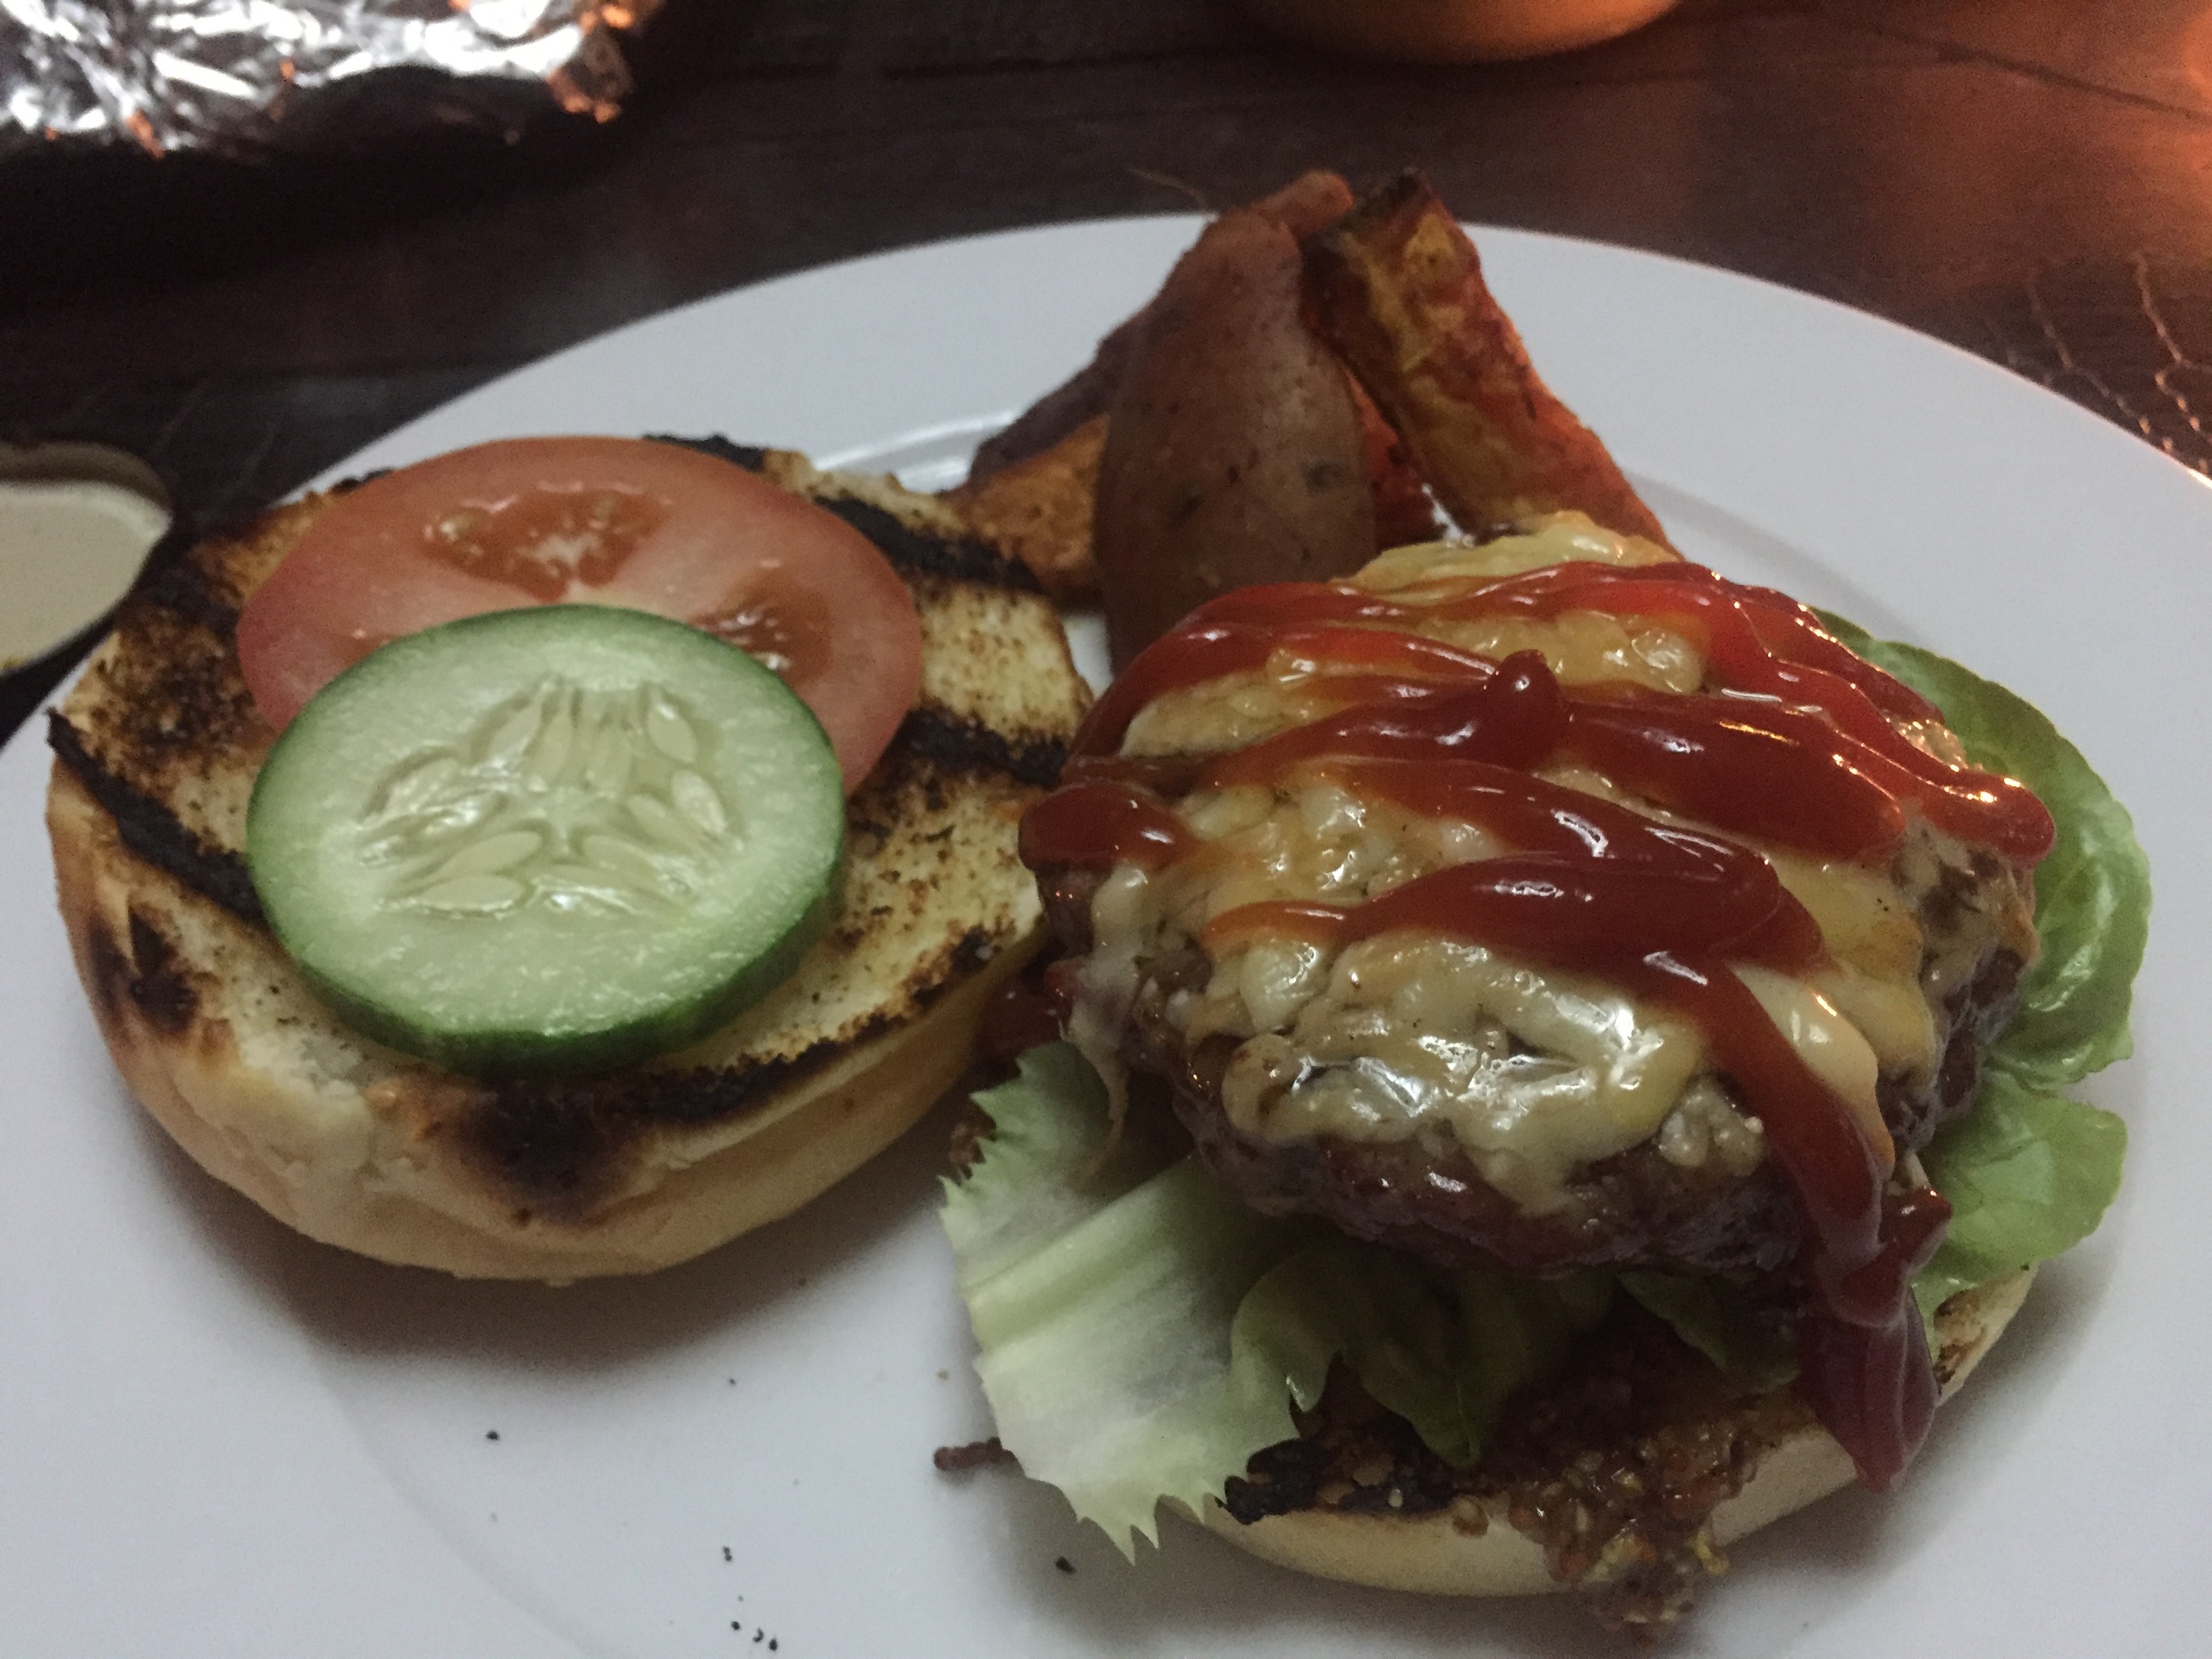
Make sure you’ve got an accurate instant read thermometer. You want to pull the burgers off at 155F. Just before you do that, add some shredded cheese and close the lid for about a minute. Remove the burgers and now place your buttered buns on for no more than 30 seconds.
Stack on some veggies, mustard, ketchup, mayo or whatever else floats your boat. We served these up with sweet potato wedges and a nice bottle of red!
Easy recipe and a great meal using a classic method. The lamb fat really provided a wonderful deep buttery flavour. If you want to wow your guests, this is surely the way to make cheeseburgers! Enjoy!
Overall Heather Rating: 10/10
Pork Rib Yakitori
Hi there fans. Back in June I received a great birthday gift, a copy of Meathead Goldwyn’s book called “The Science of Great Barbecue and Grilling.” I’ve been a big fan of his for years and have recreated some of his signature recipes on this blog.
Now, I’ve read the book from start to finish and over the past weekend I decided it was time to try out a recipe that had piqued my curiosity for a while. In the book the recipe is called “Happy Mouth Yakitori Ribs” and I must admit, it didn’t disappoint! I’ve not found the recipe online as yet so you’ll need to purchase the book (to be fair to my pal Meathead too!) That said, I’ve taken a few minor liberties with this recipe that I’m sure you’ll enjoy.
The approach is pretty unconventional to say the least. With this recipe, we move away from traditional ‘low and slow’ cooking for up to 6 hours and shave that down to about 2 hours in total. The preparation also makes a regular rib cook a bit nervous as well. But, if you follow my interpretation of the recipe, you’ll wow your pals, neighbours and family with this Japanese take on pork ribs.
The prep:
Prepare three slabs of St. Louis cut ribs by removing the silver skin from the bone side of the ribs. Start by lifting a bit off the bone with a butter knife then grab some paper towel (kitchen roll) and grab the flap and pull the membrane off completely.
Now, cut the ribs into individual pieces ensuring that you’ve got an equal amount of meat on either side of the bone. Normally we’d cook the entire slab of ribs but by cutting them into individual pieces you cut the cooking time exponentially and you’ll get each rib to look and taste amazing.
Traditional Yakitori uses chicken meat (from the thigh or gizzard or just about any part really) and there is no marinade used whatsoever. You rely purely on the sauce that you’ll make. For the ribs, I went with a a light dusting of salt and pepper a few hours before I was ready to cook the ribs. Seasoning the ribs helps a lot with the flavour but remember go easy, you don’t need to coat them like you would if you were smoking traditional KC style ribs.
The Yakitori Sauce:
Put the ribs back into the fridge and get ready to prepare the Yakitori sauce. For that you’ll need the following ingredients:
- 1/2 cup soy sauce
- 1/2 cup sake
- 1/2 cup pure orange juice
- 1/4 cup caster sugar
- 1/4 cup freshly grated old ginger (and all the juices that you squeeze out)
- 3 tbsp quality honey
- 2 tbsp toasted sesame oil
- 1 tbsp hot sauce of your choice
- 5-7 small garlic cloves, crushed
- 1.5 tsp corn starch
Combine the above ingredients except for the cornstarch in a medium sauce pan. Let it simmer and combine for about 30 minutes on a low/medium heat. When your timer pings, remove the saucepan from the heat and strain the liquid through a fine sieve. Squeeze out all the juice from the solids through the sieve so you’re left with nothing but liquid. Put that sauce pan back onto your burner at a low heat. The smell and taste at this point is crazy!
Now, it’s time to thicken up your Yakitori sauce by mixing the corn starch with 2 tbsp of cold water. Mix it up with a fork and then add it to your sauce pan. Stir it around well and you’ll see the magic start to happen. The sauce goes a bit cloudy but will soon change viscosity to resemble something akin to motor oil. From this point, let the sauce simmer for another 15 minutes then set it aside.
The Roasting
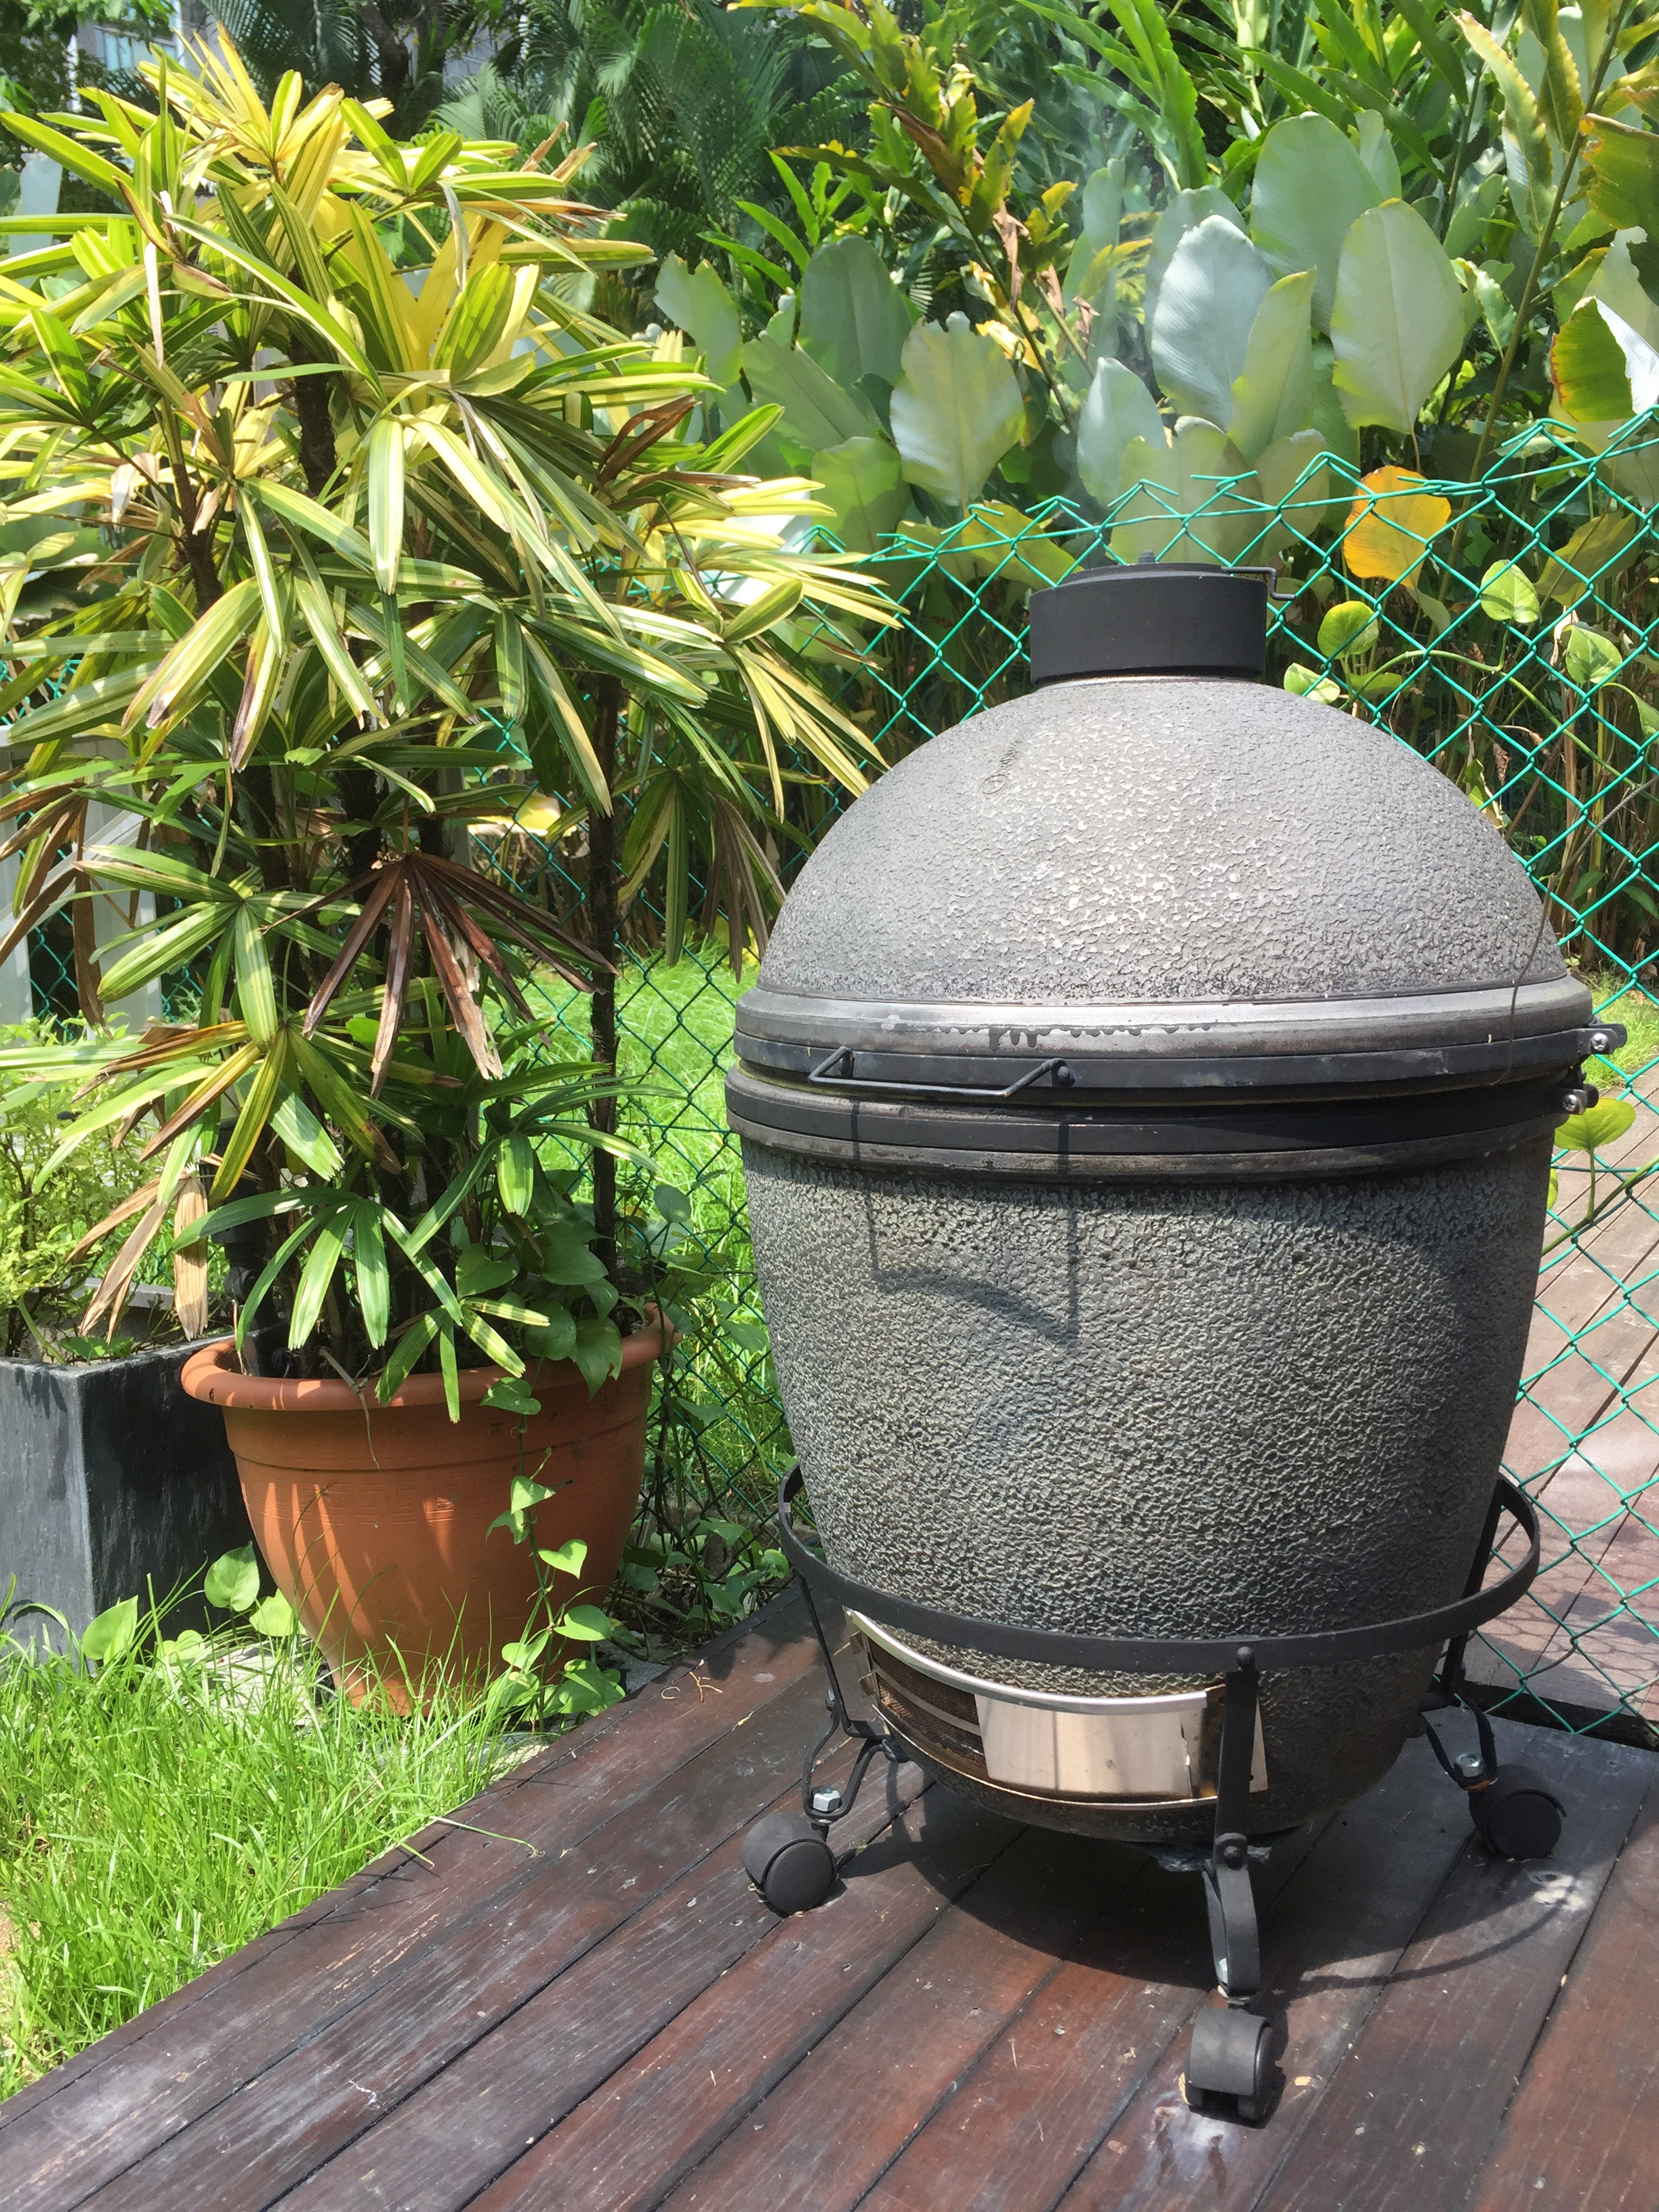
Set your grill up for indirect heat and stabilise your temperature at 225F (107C). You don’t want to add any smoke as it’ll clash with the sauce. I used a two tier grid and the Imperial Kamado I restored last year. Seemed fitting to use a Japanese kamado for a Japanese inspired dish.
Let the ribs roast for about 90 minutes. They’ll turn a beautiful golden brown colour. Take them off and place them into a metal bowl that’s deep enough for you to coat all the ribs with the sauce. Carefully pour your Yakitori sauce all over the ribs and toss them around so you get an even coating on all sides of the ribs.
Return the ribs to the grill and let them roast for another 20 minutes or so at 225F (107C). Once the sauce has baked on to the ribs, remove them and plate them up. I added toasted sesame seeds and some finely cut chives for good measure, great taste and a beautiful look. Now these ribs aren’t the type that slide off the bone. They take a bit of effort but as you’ll see in the pictures, all the meat comes off with a few simple bites. I like to work for by ribs!
All in all, an amazing new twist on pork ribs! Thanks Meathead and to the team at Amazing Ribs!
The family loved them and the neighbour’s kids devoured the few leftover ribs that we had.
Overall Heather Rating: 10/10
9 Hour Cherry Smoked Beef Short Ribs
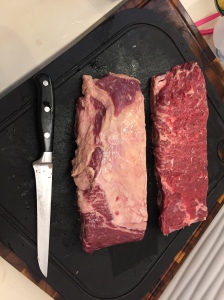
 Hi fans, here’s a great recipe we shared with good friends a few weeks back. This cut of beef, the short rib, has to be one of my favourites to eat. Once smoked between 8-10 hours, this meat literally drops from the bone and it’s juicy, flavourful and absolutely amazing to devour.
The ribs were procured from our friend Andy at New Zealand Fresh and came in four packs with four ribs per pack. The first thing you’ll want to do is slowly defrost them in the fridge over night. No sense ruining the cut with a fast and furious defrost. Once done, you’ll want trim the excess fat cap off each of the racks. There’s enough to render into some fantastic beef tallow too! Finally, you’ll want to dry brine the rib racks with some Kosher salt and let them sit overnight in the fridge.
The morning of the meal you’ll want to prepare your rub. Here’s Meathead’s Big Bad Beef Rub (slightly adjusted accounting for less pepper.)
- 1.5 tablespoons coarsely ground black pepper
- 1 tablespoon granulated white sugar
- 1 tablespoon onion powder
- 2 teaspoons mustard powder
- 2 teaspoons garlic powder
- 2 teaspoons chili powder
- 1 teaspoon chipotle or cayenne powder
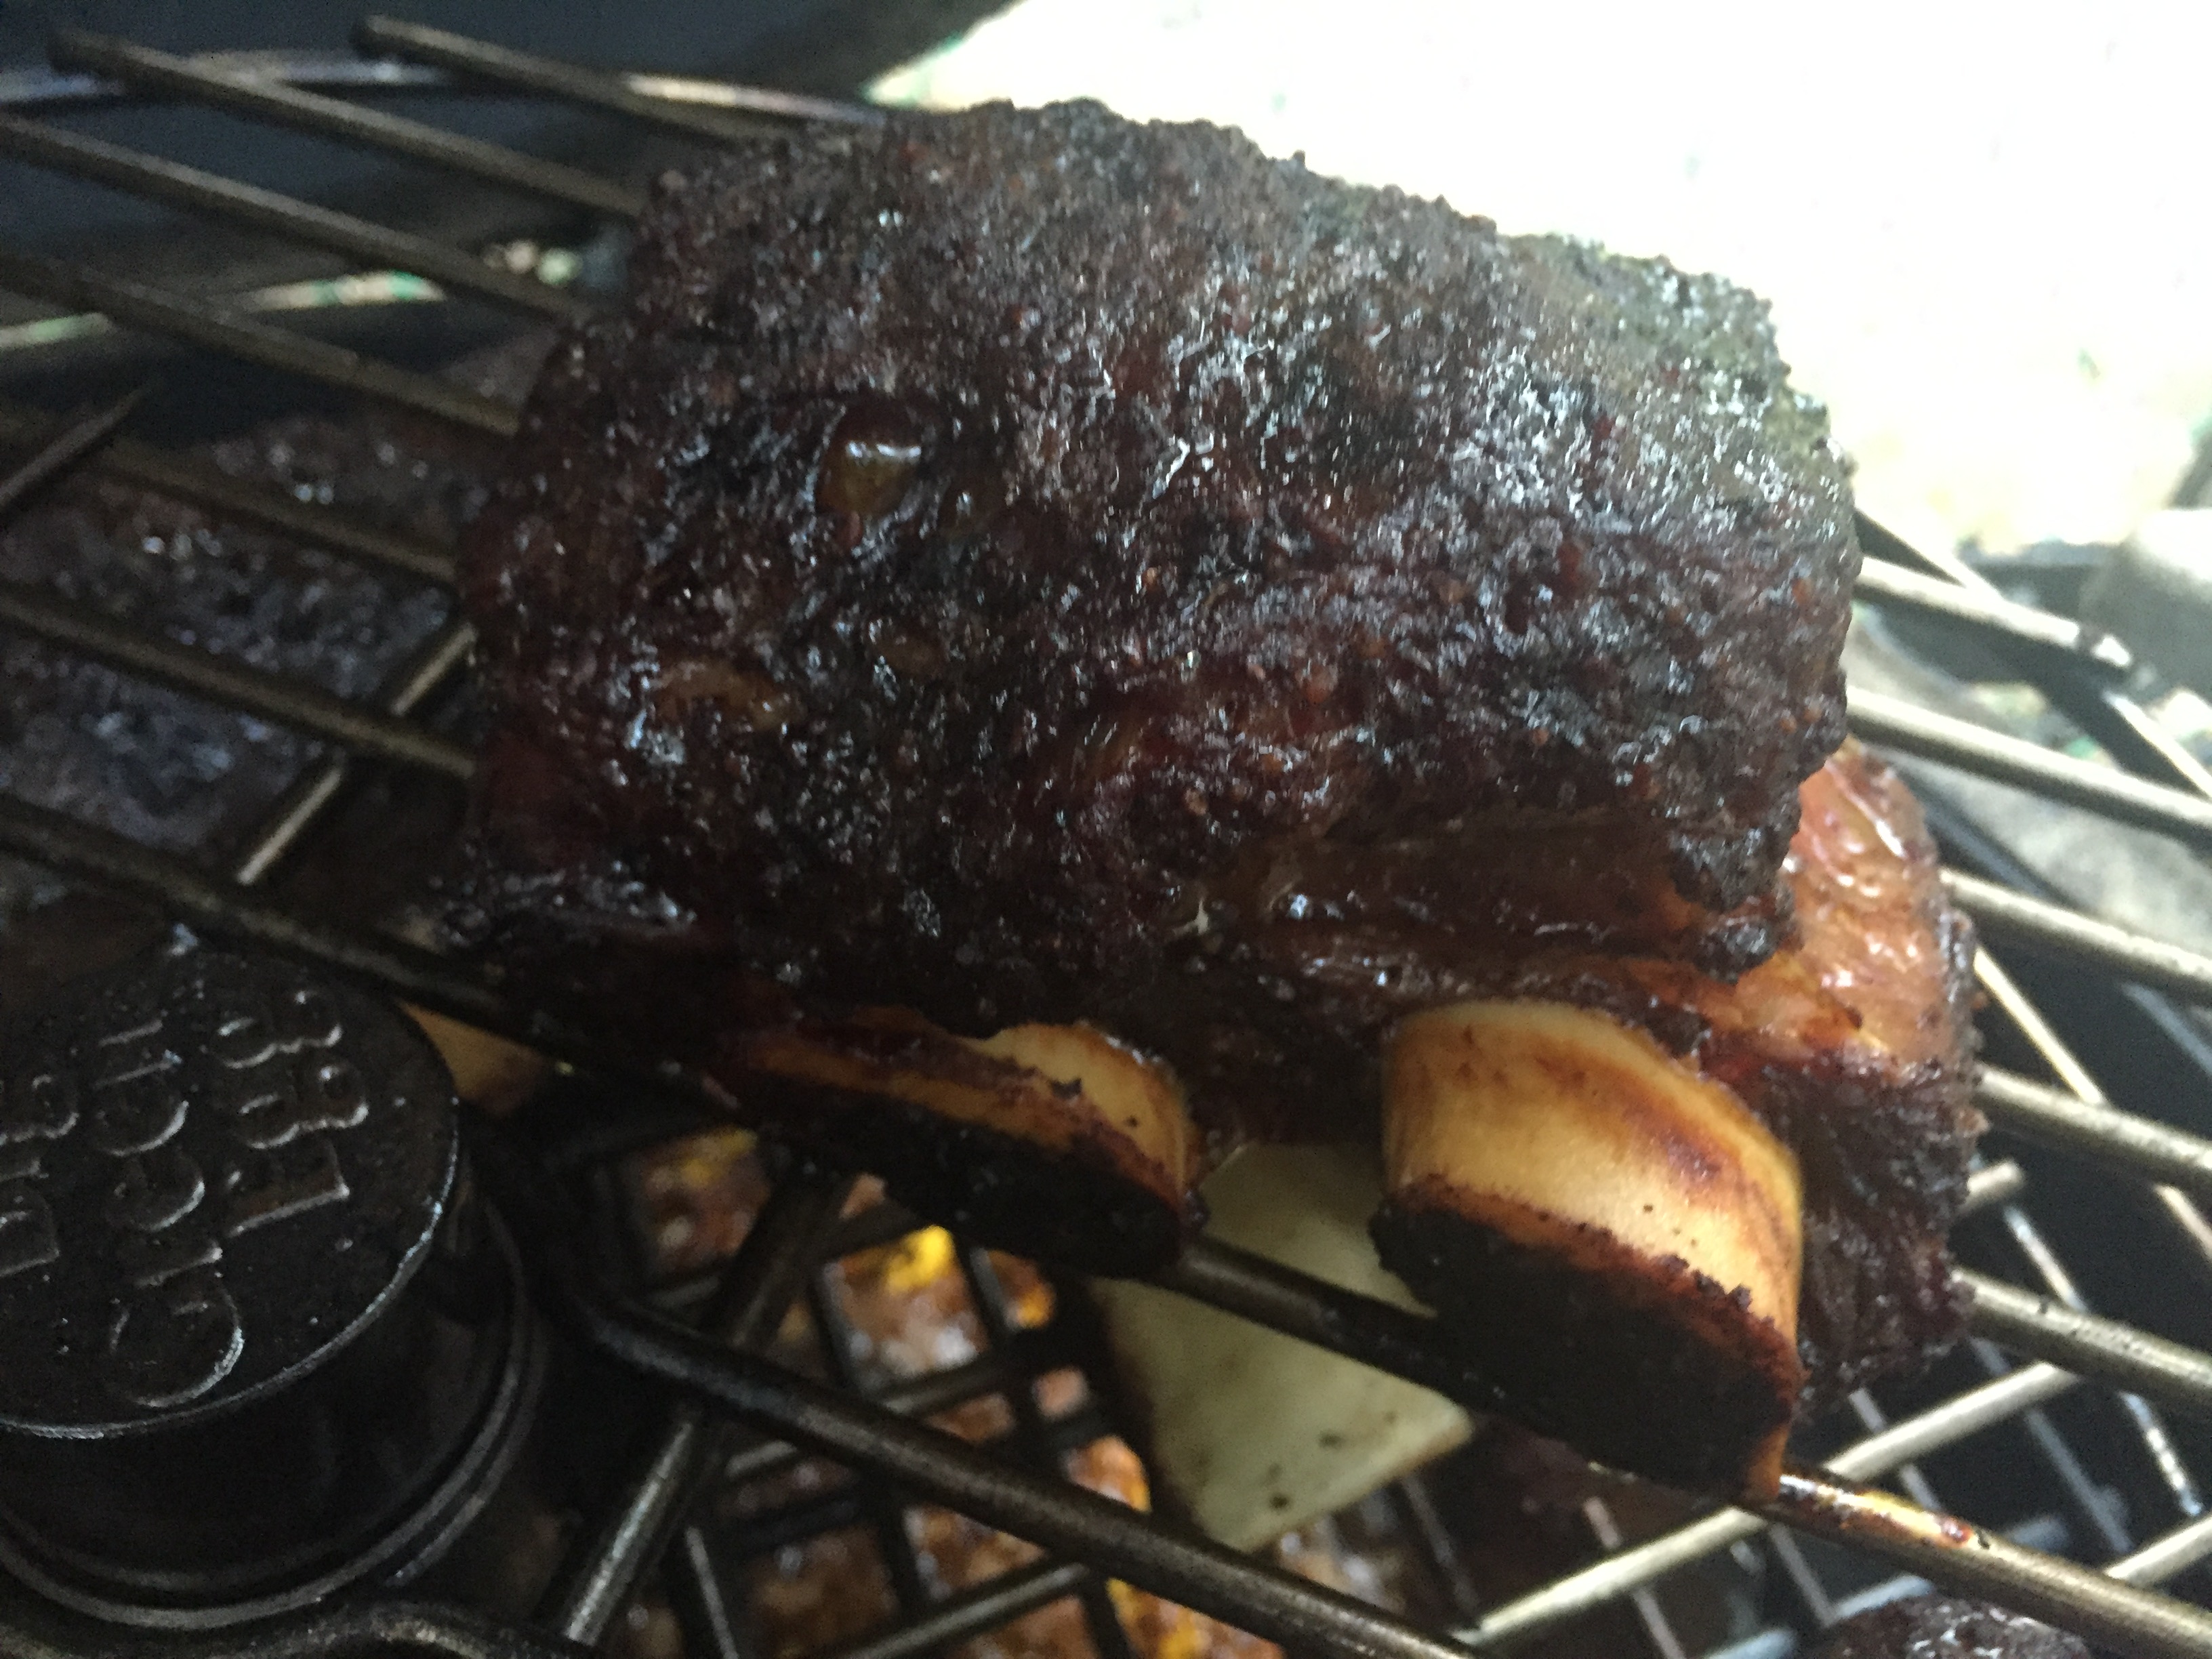
When you’re ready, cut the rib racks into 2-rib sections. Wet the ribs with plain tap water and then apply the rub EVERYWHERE! Set up your smoker for indirect heat and stabilise it at 225F (107C). I added a bit of cherry wood for smoke as a mesquite would be too powerful. You want the ribs to really stand out here. Too much smoke or the wrong type can really spoil this dish.


I used a two tier rack and placed a drip pan full of beef stock underneath the ribs. You want to catch all that lovely juice as it renders from the ribs. Gravy, baked beans, soup…you name, you can use it.
Place the ribs bone side down and insert a reliable thermometer probe into one of the thickest cuts. Make sure you’re not touching bone here or else you’ll get an inaccurate reading.
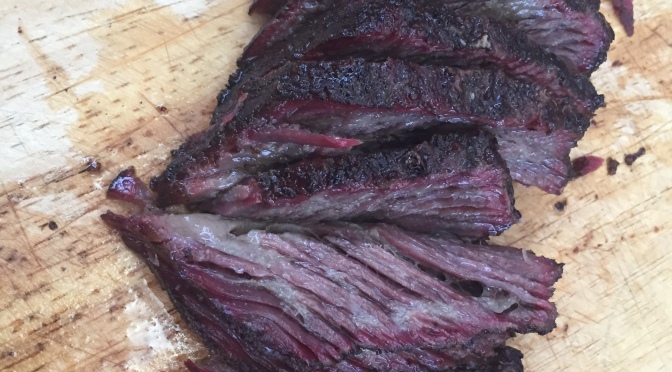
Let the smoking begin. Your target internal temperature will be just like a big beef brisket… the magic number of 203F (95C.) These ribs took just over 9 hours and were worth every minute of waiting time. Once you hit the magic temperature, remove them gently as the meat will literally slide off the bone. Let them rest for a bit because they’re hot…I mean nuclear hot. Then, skilfully slice the ribs off the bone and carve on an angle. Notice the smoke ring that forms after 9 hours! Gorgeous!
Serve em up with some of Roman’s “Fart Soup” (a recipe for another day) and call some good friends over.
Overall Heather Rating: 10/10

Easter Lamb
 Happy Easter to one and all… We had a pretty quite Easter weekend. One was down with tonsillitis and the other was just shattered with a lack of sleep and a touch of the cold. Thankfully yours truly felt fine…
To celebrate Easter I paid homage to our old neighbours, the Greek family Petrakis! Lamb was on the menu and don’t I wish I was able to make this when we were kids.
I gently smoked two racks of lamb with a touch of cherry wood. Of course I marinaded the lamb for 30 hours in a mixture of extra virgin olive oil, one full head of garlic (minced), 5 springs of rosemary, 10 sprigs of thyme and 10 sprigs of fresh oregano. Chop it all up and place the lamb and the herbs into a zip top bag overnight.


When ready, get your grill set to 225F (107C) with indirect heat. Add your cherry wood and smoke the lamb for about 45 minutes or until the internal temperature hits 120 F. Then get your grill nice and hot and sear the lamb for another 5-10 degrees more.
Rest it for 5 minutes and serve.
Another amazing, though quiet Easter for our family this year. It was rather special as I let Kalyna (the 5 year old) draw on the Imperial Kamado, turning it into a wonderful painted Easter Egg. Nice one kiddo!
The Magic of Wagyu
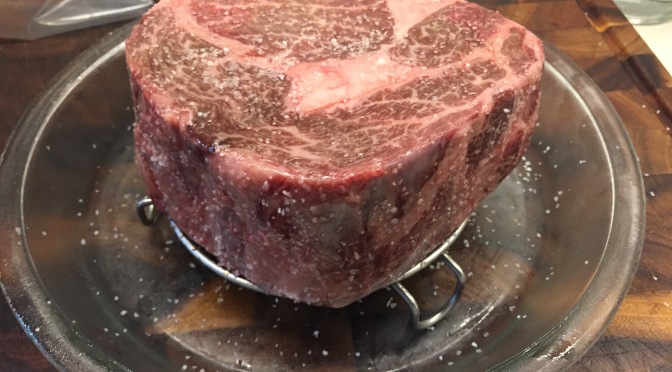
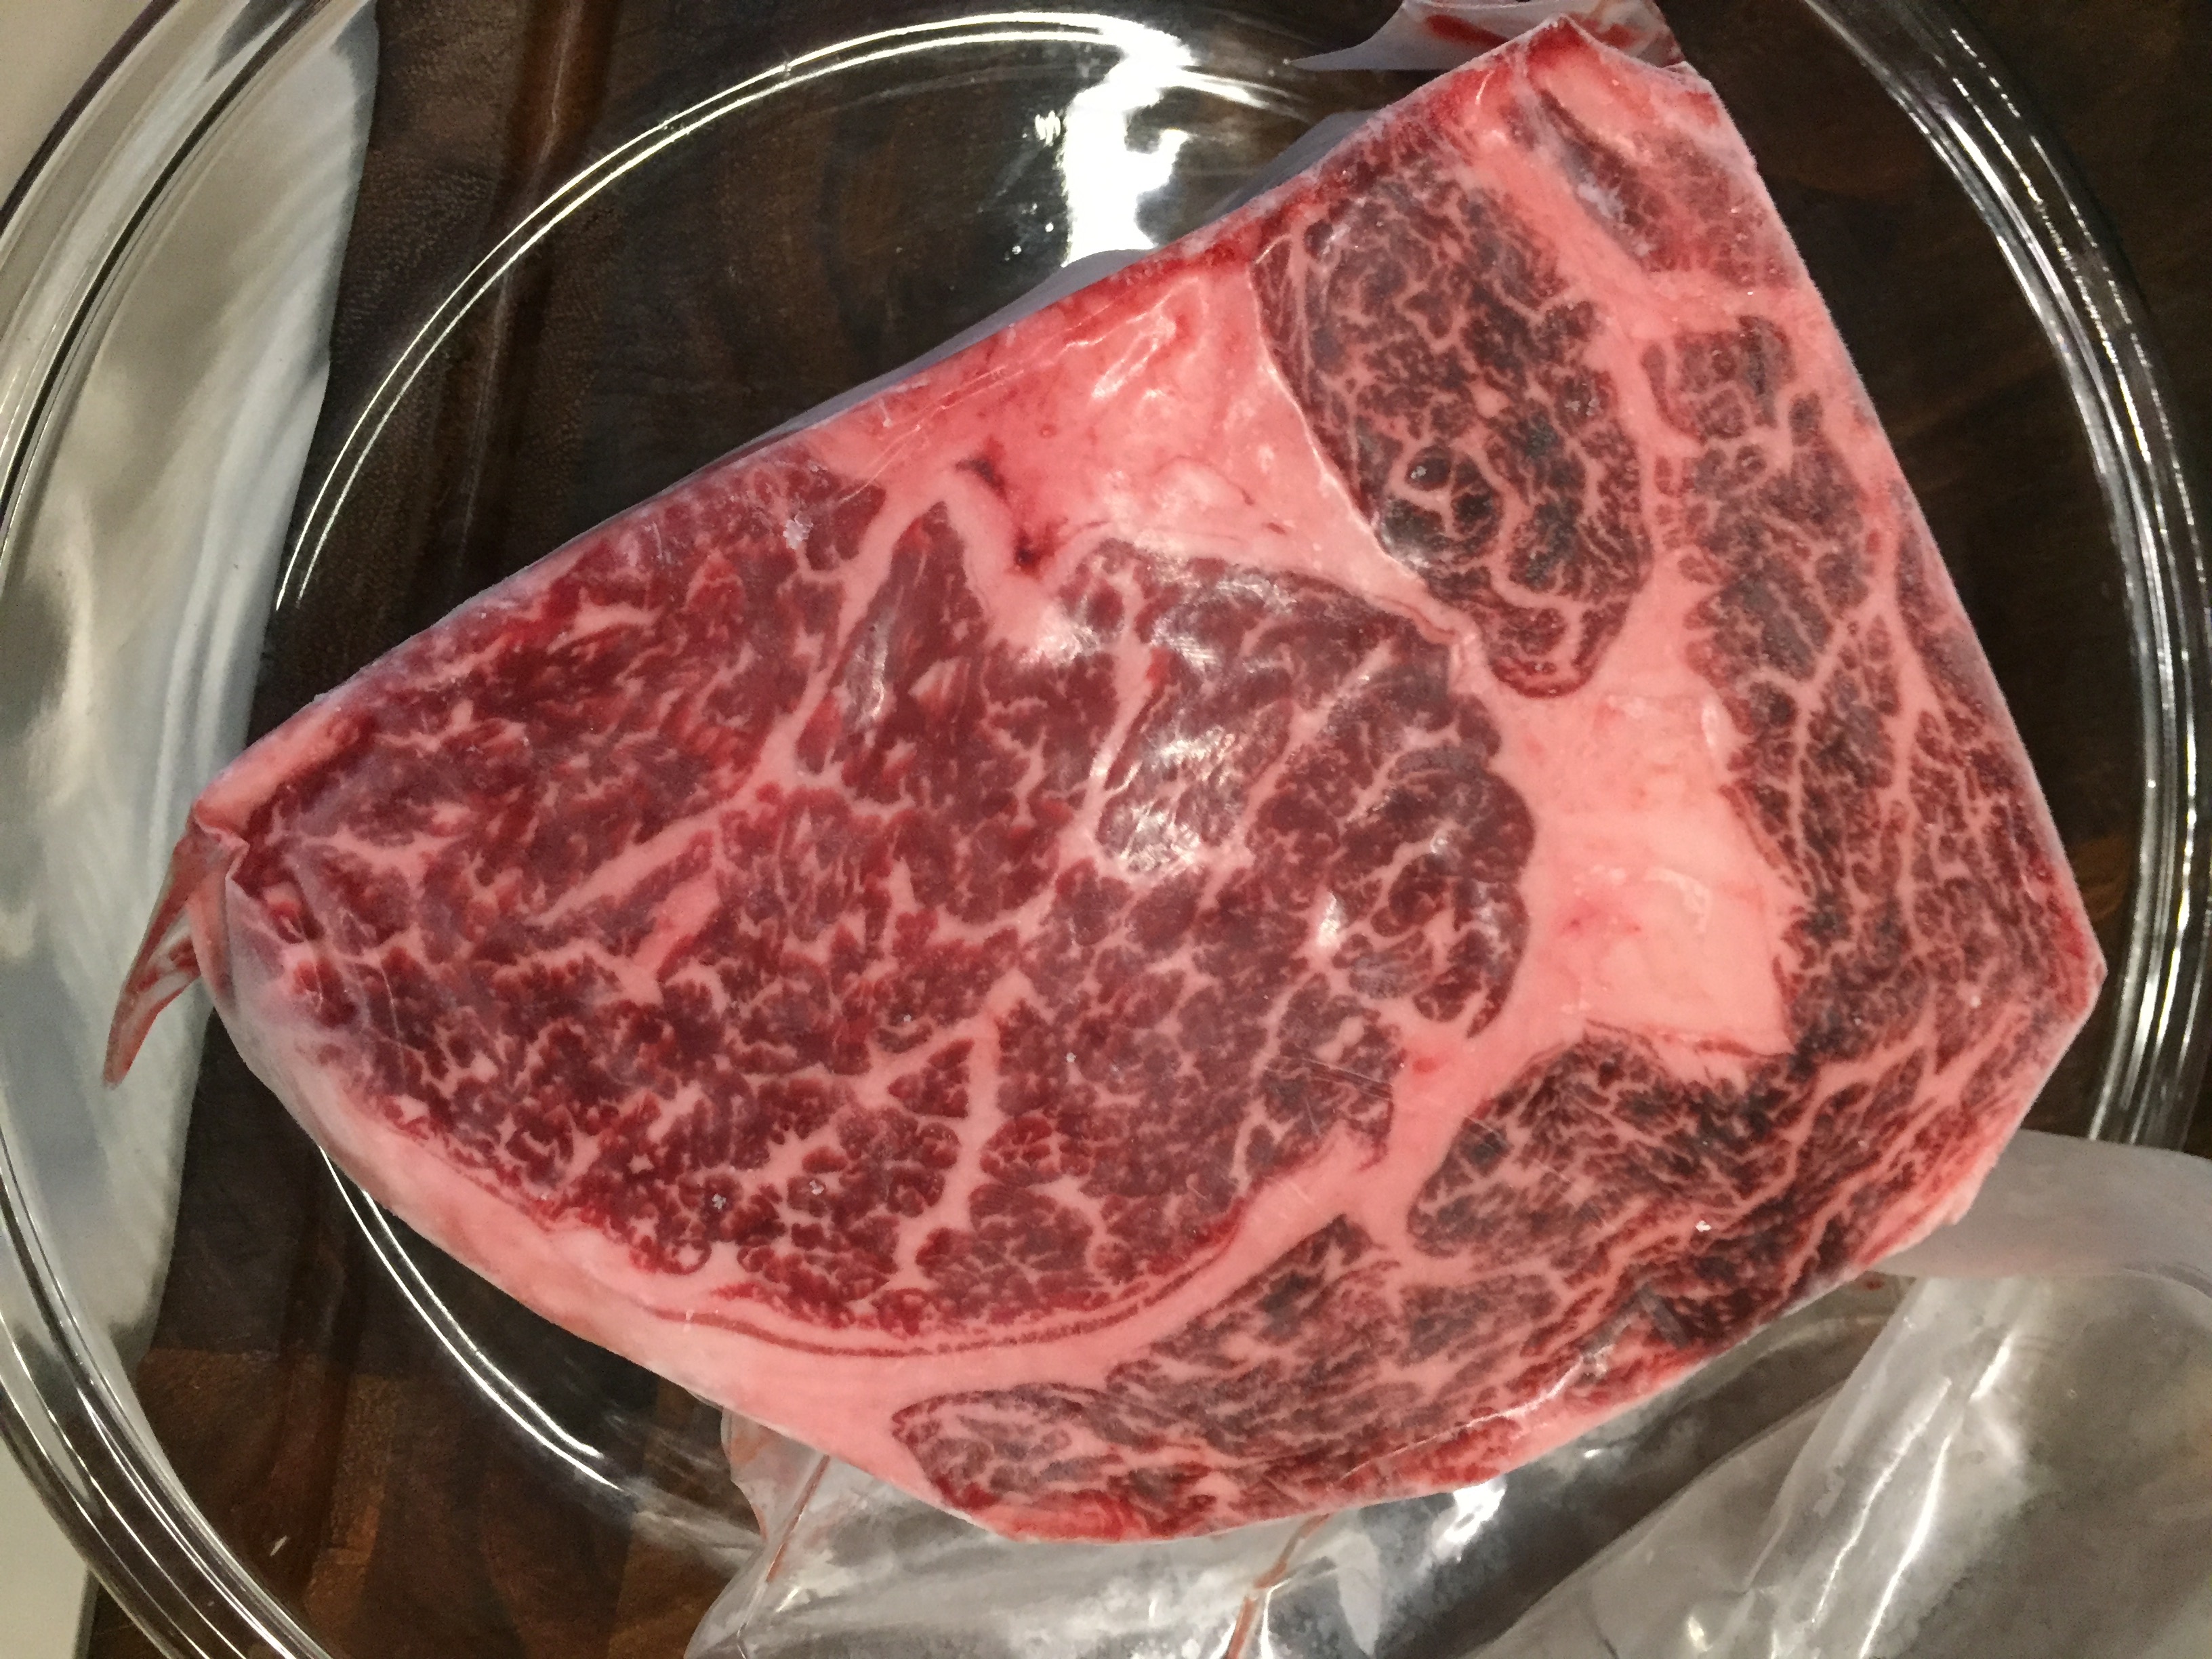 Hiya grillers! Looking back at some of my photos recently I came across a series of dinners where we devoured some amazing Australian Wagyu beef. The marbling rating was 6/7 and the cost was SGD $100/kg. QB occasionally gets Wagyu that in and it’s worth snapping up, if you’ve some extra cash on hand.
Now, the cost may seem ridiculously expensive but it was at least $45 to $60 cheaper per kilogram than any other supplier I could find. Ergo, DEAL!
I had the butcher cut the beef into three mammoth steaks. They were about 2.5 – 3 inches thick. He then vacuum sealed them individually so that we could (yikes) freeze two out of the three steaks.
Prepping the first of the behemoths was simple as dry brining with a healthy coating of Kosher salt, that’s it! I brined them overnight so that the salt gets sucked into the beef penetrating as deeply as possible.


To grill, I used the reverse searing method, setting up the Big Green Egg for indirect heat, stabilised at 225F (107C) with a handful of Beech wood chips. Allowing for a bit of smoke, gently bring up the temperature of the steak to 115F (46C) then remove it from the grill.
Slather the steak with some pre-melted beef or lamb fat at the same time as bringing up your grill to scorching hot, direct heat. To minimise flame burn, I use Grill Grates for any searing, flipping them over to use them as a griddle top. The aircraft grade aluminium gets so hot that searing steaks is simple and quick. If you don’t own a set of theses, I highly recommend you get a set!
You want to remove the steak once the internal temperature hits 123F (50.5C). Set it aside and let it rest for 5-10 minutes. It’ll rise another few degrees but you don’t want to bring the temperature more than 130F (54C). Slice on a 45 degree angle, nice and thin. Plate it on a platter and serve.
With the fat content of these steaks, chewing was optional. Seriously, every single bite melted in your mouth with minimal effort. The taste was exceptional and honestly, I’ve not had it’s equal, not at home or in a restaurant!


Super huge thanks to my dear colleagues Jeremy and Vicky for bringing along their “significant bests” to sample this beef with us. Yes, we had two sets of guests two weeks apart from each other. Despite freezing the other two steaks, they thawed perfectly in the fridge and the taste was just as good as the chilled beef.
Overall Heather Rating: 10/10
Valentine’s Lobster – An annual tradition
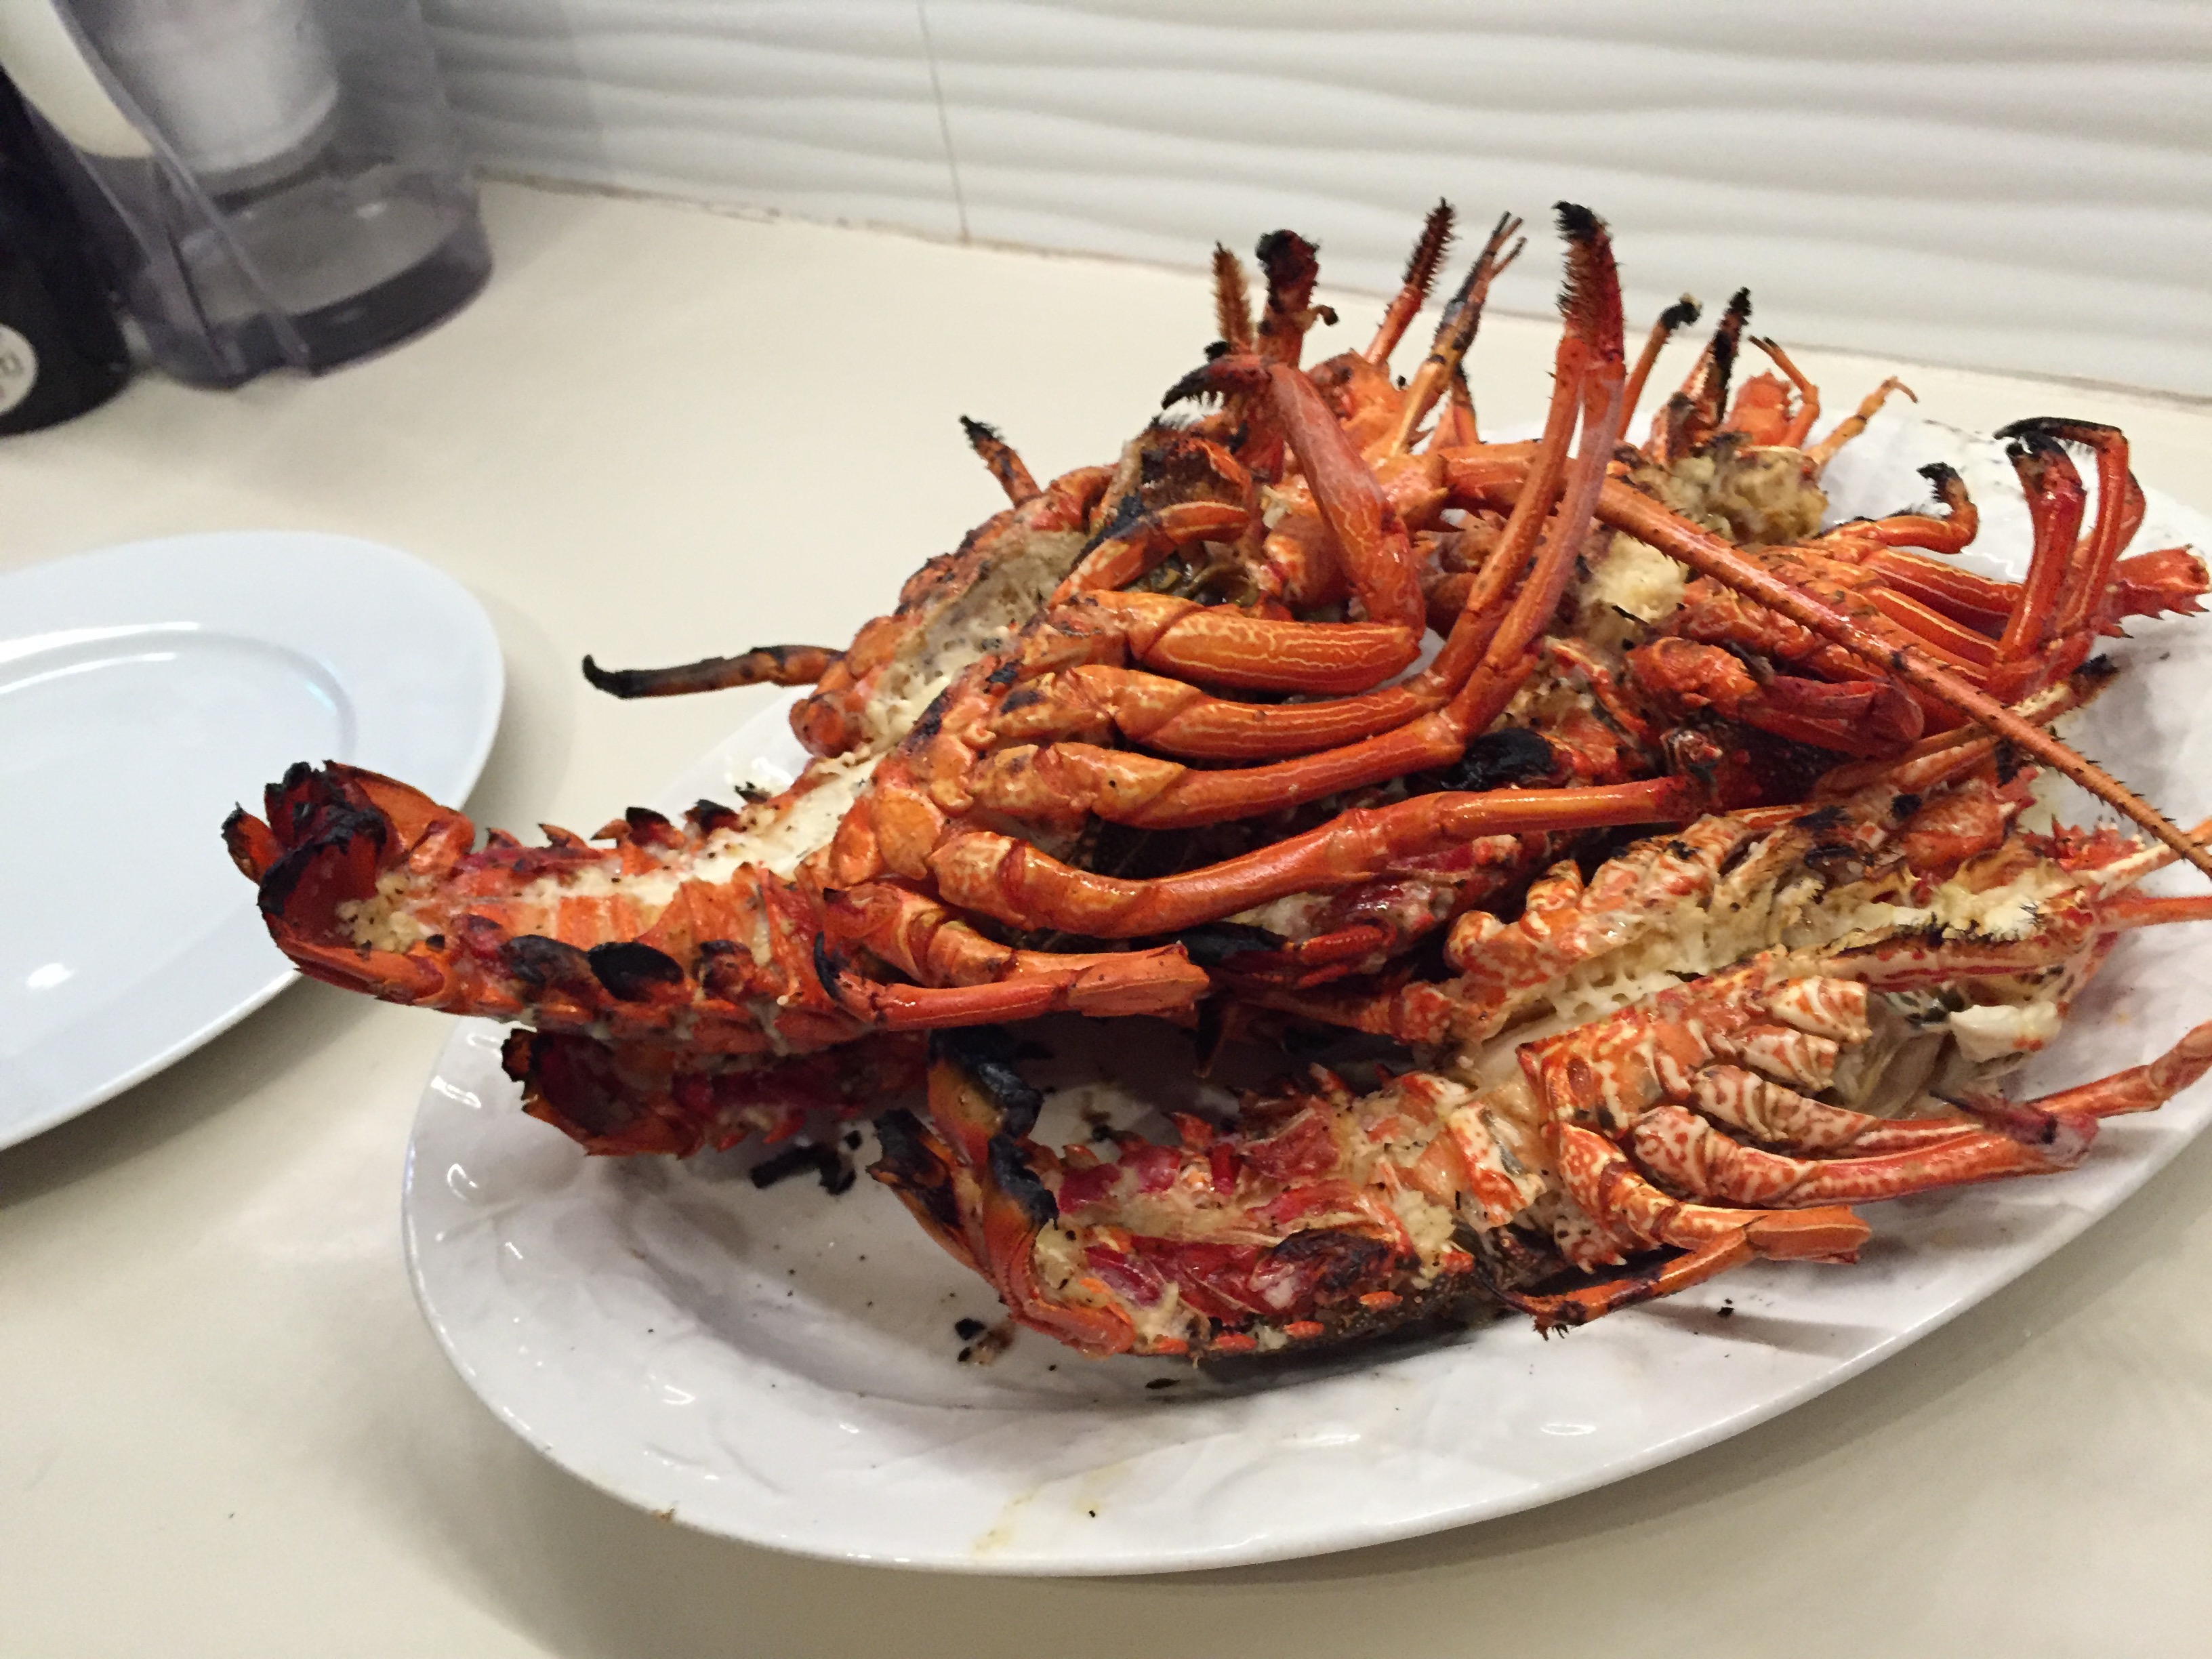
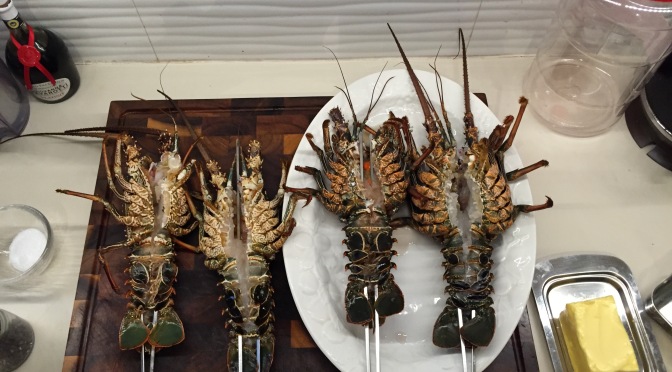
Once again Heather and I decided to stick to tradition and grill up a few lobsters for Valentine’s Day. I love going out for dinner but not on that night. Why pay stupid prices on that night especially when you can create something even more special at home.
We try to do this every year and well, this year was no exception. The lobsters (4×450 g) were sourced from Kranji, which if you live in Singapore, you’ll know that seems like another planet. The benefit is, you’re getting wholesale prices for the freshest seafood. In fact, this place is so good that we ended up meeting our favourite hawker stall proprietor Terrence. He buys his seafood at the same place… now we know it’s good.
A side note, if you’re ever in Singapore, you MUST visit our pal Terrence. He runs a place call New Gillman’s Seafood. It’s practically the best local cuisine you’ll get on the island and a fraction of the cost. Tell him Roman & Heather sent you!
Anyway, back to the lobster. Here’s how simple this is:
- Buy ’em
- Put them in a freezer for about an hour or two to help lull them into a sense of safety and comfort.
- Dispatch them but using a super sharp knife. Get between the eyes and bring it straight down. It’s the quickest and kindest way to help them meet their maker.
- Cut down the belly side from tip to tail. Wash out the end-trails and then put a metal skewer from the tip of the tail upwards towards the head. The keeps the lobster from curling up into a ball once you’ve got them on the grill.
- Make up a simple sauce of heavy cream and melted butter and then season the inside of the lobster with a good helping of Kosher salt and black pepper.
Preheat your grill to 450-500 F (232-260C). Lay down your lobsters on their backs and cook them for about 10-15 minutes. The meat should be flaky and not translucent. Baste the lobsters with the cream and butter throughout the grilling.
When ready, pair up your lobster with anything you fancy but make sure you have a bottle of Champagne to celebrate the one you love.


Overall Heather Rating: 10/10
