
Hi loyal followers. I wanted to let you know that we’ve decided to retire BGAE and move it to a new site that’s more interactive and inclusive of all kamado and kamado-style cooking. You can find all your favourite recipes and updates on https://www.thekamadoclub.com. Come and check us out and follow the new adventures at TKC. Drop us a message and show you care!
Cheers!
Roman
Category Archives: Uncategorized
Chuck ‘n lamb cheeseburgers
Hi there folks! Yesterday I tried something I’ve been meaning to do for ages, and that was to make burgers from absolute scratch. No pre-purchased mince, just animal parts and a grinder. The result? Amazing flavour, incredible consistency and most importantly, no wastage!
This all started with lamb that I was prepping for the next day. Trim off all the fat you need to and take the trimmings – not the silver skin – and run it through a course grinder. You need a good piece of machinery to do this right. We use a sturdy Kitchen-aid more than anything. Set the fat aside in the fridge. Go and wash the grinder and parts thoroughly.
Now get approximately 2.5 kg of beef chuck. The chuck is found above the brisket (pectoral muscle) of a cow. It’s the muscle cows use to throw things like basketballs and frisbees, not really but stranger things have happened.
 Trim off any silver skin and cube the chuck into pieces that are small enough to drop into your grinder feeder. Grind it up and get your lamb fat out of the fridge because now you combine.
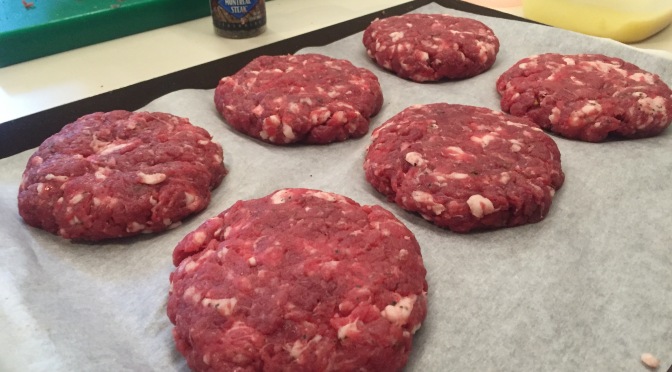
Chuck is very lean meat so you need some extra fat to give it a flavour boost and to help bind it and not make it rubbery. You want a rough ratio of 80:20 chuck to fat. You can use beef fat, suet, streaky bacon or as I did, lamb fat. Using a digital scale I took 500 g of beef and 100 g of lamb fat and combined the two in a metal bowl. Once combined I seasoned the mince with a hearty helping of Montreal steak seasoning and some kosher salt. Grab a handful and measure out about 150 g for each patty. Form your patties and place them on a baking sheet lined with non-stick baking paper. Repeat the process three times to yield 12 hearty-sized patties. Now put them all back into the fridge to help them firm up. At this point, go light your grill.
Set up your grill for about 450F – nice and hot. I used my trusty grill grates (a must have) to get a nice sear and the deep grooves allow for easy flipping.
Put the burgers on and close the lid for 3 minutes then CAREFULLY open the lid allowing for a burp minimizing the chance of a massive fireball. Turn the burgers one quarter to left or right, this gets the nice diamond sear pattern. At five minutes flip the burgers and repeat the process.
Make sure you’ve got an accurate instant read thermometer. You want to pull the burgers off at 155F. Just before you do that, add some shredded cheese and close the lid for about a minute. Remove the burgers and now place your buttered buns on for no more than 30 seconds.
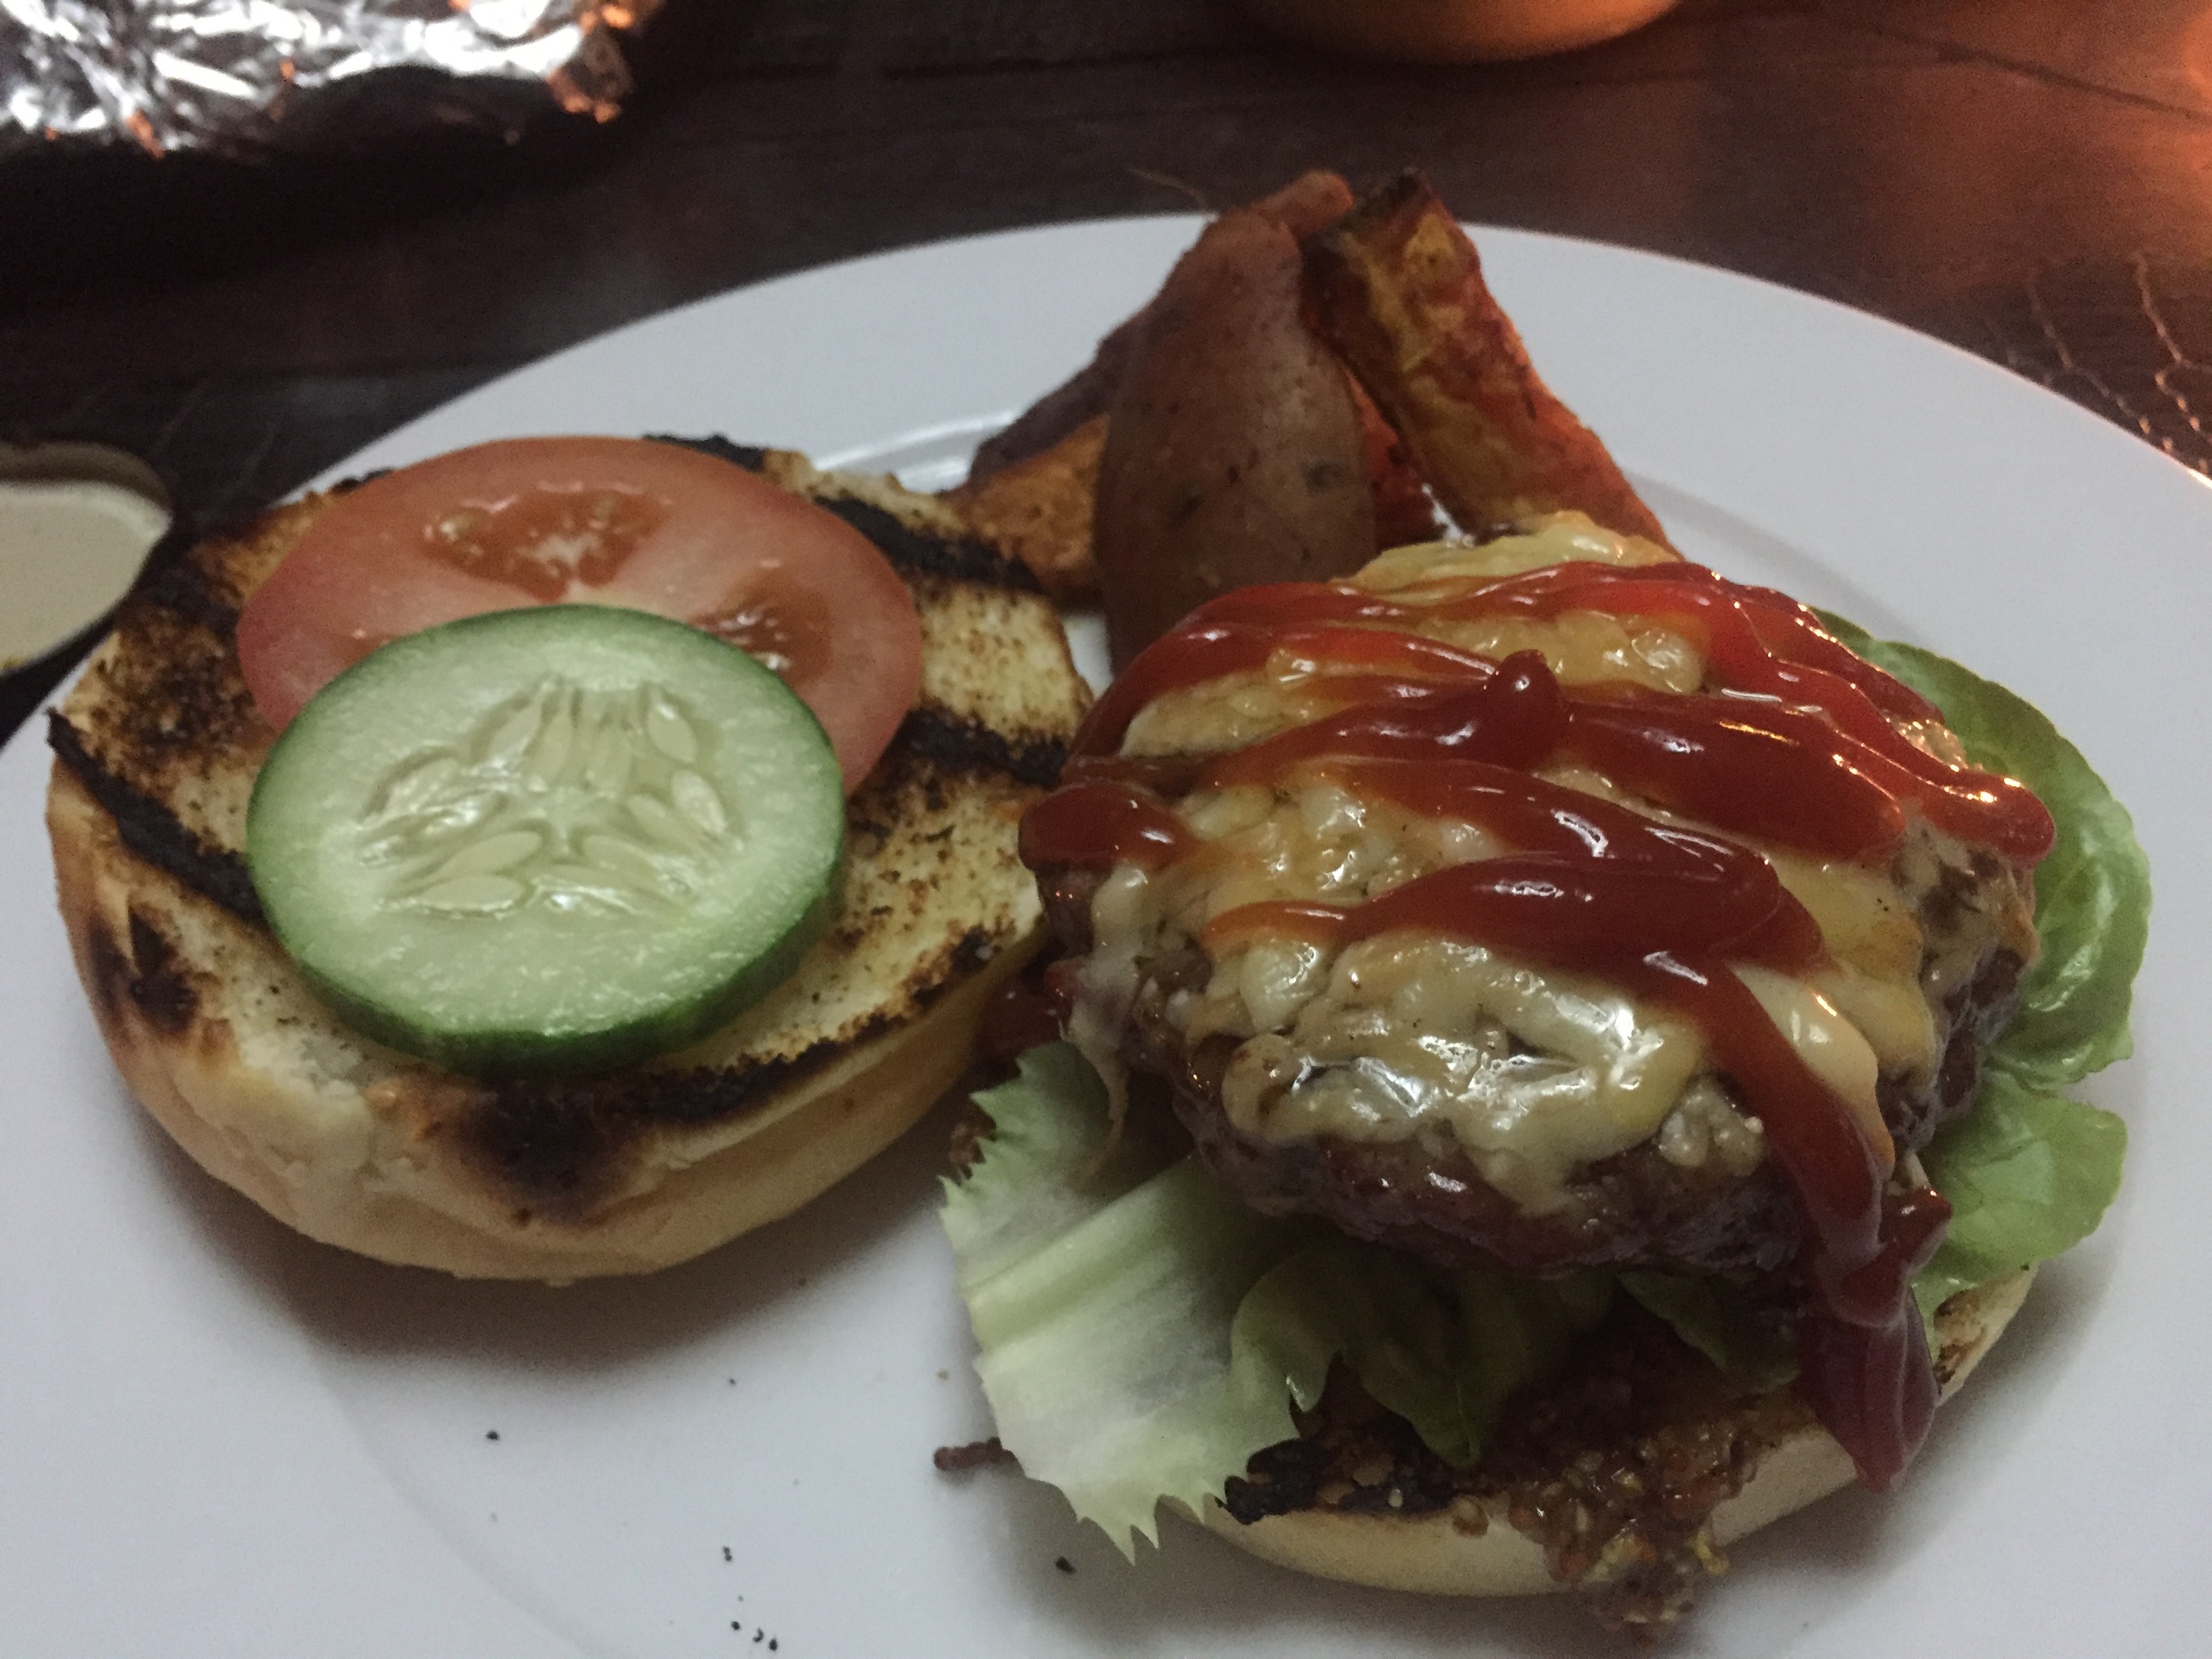
Stack on some veggies, mustard, ketchup, mayo or whatever else floats your boat. We served these up with sweet potato wedges and a nice bottle of red!
Easy recipe and a great meal using a classic method. The lamb fat really provided a wonderful deep buttery flavour. If you want to wow your guests, this is surely the way to make cheeseburgers! Enjoy!
Overall Heather Rating: 10/10
Pork Rib Yakitori
Hi there fans. Back in June I received a great birthday gift, a copy of Meathead Goldwyn’s book called “The Science of Great Barbecue and Grilling.” I’ve been a big fan of his for years and have recreated some of his signature recipes on this blog.
Now, I’ve read the book from start to finish and over the past weekend I decided it was time to try out a recipe that had piqued my curiosity for a while. In the book the recipe is called “Happy Mouth Yakitori Ribs” and I must admit, it didn’t disappoint! I’ve not found the recipe online as yet so you’ll need to purchase the book (to be fair to my pal Meathead too!) That said, I’ve taken a few minor liberties with this recipe that I’m sure you’ll enjoy.
The approach is pretty unconventional to say the least. With this recipe, we move away from traditional ‘low and slow’ cooking for up to 6 hours and shave that down to about 2 hours in total. The preparation also makes a regular rib cook a bit nervous as well. But, if you follow my interpretation of the recipe, you’ll wow your pals, neighbours and family with this Japanese take on pork ribs.
The prep:
Prepare three slabs of St. Louis cut ribs by removing the silver skin from the bone side of the ribs. Start by lifting a bit off the bone with a butter knife then grab some paper towel (kitchen roll) and grab the flap and pull the membrane off completely.
Now, cut the ribs into individual pieces ensuring that you’ve got an equal amount of meat on either side of the bone. Normally we’d cook the entire slab of ribs but by cutting them into individual pieces you cut the cooking time exponentially and you’ll get each rib to look and taste amazing.
Traditional Yakitori uses chicken meat (from the thigh or gizzard or just about any part really) and there is no marinade used whatsoever. You rely purely on the sauce that you’ll make. For the ribs, I went with a a light dusting of salt and pepper a few hours before I was ready to cook the ribs. Seasoning the ribs helps a lot with the flavour but remember go easy, you don’t need to coat them like you would if you were smoking traditional KC style ribs.
The Yakitori Sauce:
Put the ribs back into the fridge and get ready to prepare the Yakitori sauce. For that you’ll need the following ingredients:
- 1/2 cup soy sauce
- 1/2 cup sake
- 1/2 cup pure orange juice
- 1/4 cup caster sugar
- 1/4 cup freshly grated old ginger (and all the juices that you squeeze out)
- 3 tbsp quality honey
- 2 tbsp toasted sesame oil
- 1 tbsp hot sauce of your choice
- 5-7 small garlic cloves, crushed
- 1.5 tsp corn starch
Combine the above ingredients except for the cornstarch in a medium sauce pan. Let it simmer and combine for about 30 minutes on a low/medium heat. When your timer pings, remove the saucepan from the heat and strain the liquid through a fine sieve. Squeeze out all the juice from the solids through the sieve so you’re left with nothing but liquid. Put that sauce pan back onto your burner at a low heat. The smell and taste at this point is crazy!
Now, it’s time to thicken up your Yakitori sauce by mixing the corn starch with 2 tbsp of cold water. Mix it up with a fork and then add it to your sauce pan. Stir it around well and you’ll see the magic start to happen. The sauce goes a bit cloudy but will soon change viscosity to resemble something akin to motor oil. From this point, let the sauce simmer for another 15 minutes then set it aside.
The Roasting
Set your grill up for indirect heat and stabilise your temperature at 225F (107C). You don’t want to add any smoke as it’ll clash with the sauce. I used a two tier grid and the Imperial Kamado I restored last year. Seemed fitting to use a Japanese kamado for a Japanese inspired dish.
Let the ribs roast for about 90 minutes. They’ll turn a beautiful golden brown colour. Take them off and place them into a metal bowl that’s deep enough for you to coat all the ribs with the sauce. Carefully pour your Yakitori sauce all over the ribs and toss them around so you get an even coating on all sides of the ribs.
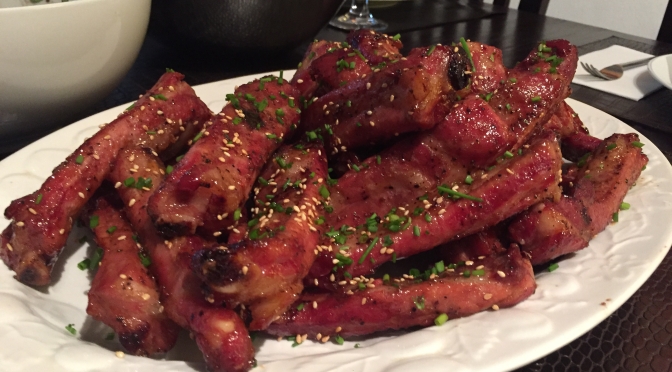
Return the ribs to the grill and let them roast for another 20 minutes or so at 225F (107C). Once the sauce has baked on to the ribs, remove them and plate them up. I added toasted sesame seeds and some finely cut chives for good measure, great taste and a beautiful look. Now these ribs aren’t the type that slide off the bone. They take a bit of effort but as you’ll see in the pictures, all the meat comes off with a few simple bites. I like to work for by ribs!
All in all, an amazing new twist on pork ribs! Thanks Meathead and to the team at Amazing Ribs!
The family loved them and the neighbour’s kids devoured the few leftover ribs that we had.
Overall Heather Rating: 10/10
9 Hour Cherry Smoked Beef Short Ribs
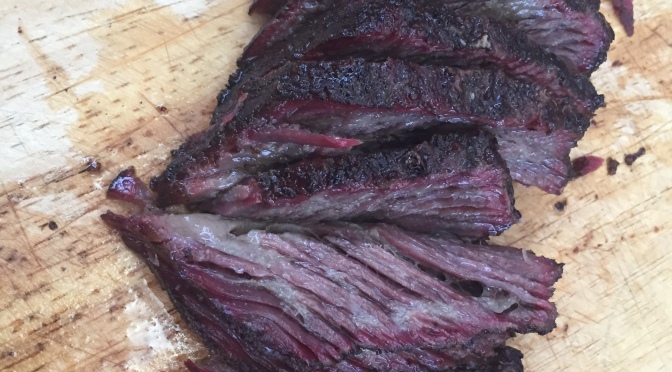
 Hi fans, here’s a great recipe we shared with good friends a few weeks back. This cut of beef, the short rib, has to be one of my favourites to eat. Once smoked between 8-10 hours, this meat literally drops from the bone and it’s juicy, flavourful and absolutely amazing to devour.
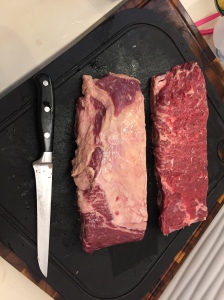
The ribs were procured from our friend Andy at New Zealand Fresh and came in four packs with four ribs per pack. The first thing you’ll want to do is slowly defrost them in the fridge over night. No sense ruining the cut with a fast and furious defrost. Once done, you’ll want trim the excess fat cap off each of the racks. There’s enough to render into some fantastic beef tallow too! Finally, you’ll want to dry brine the rib racks with some Kosher salt and let them sit overnight in the fridge.
The morning of the meal you’ll want to prepare your rub. Here’s Meathead’s Big Bad Beef Rub (slightly adjusted accounting for less pepper.)
- 1.5 tablespoons coarsely ground black pepper
- 1 tablespoon granulated white sugar
- 1 tablespoon onion powder
- 2 teaspoons mustard powder
- 2 teaspoons garlic powder
- 2 teaspoons chili powder
- 1 teaspoon chipotle or cayenne powder
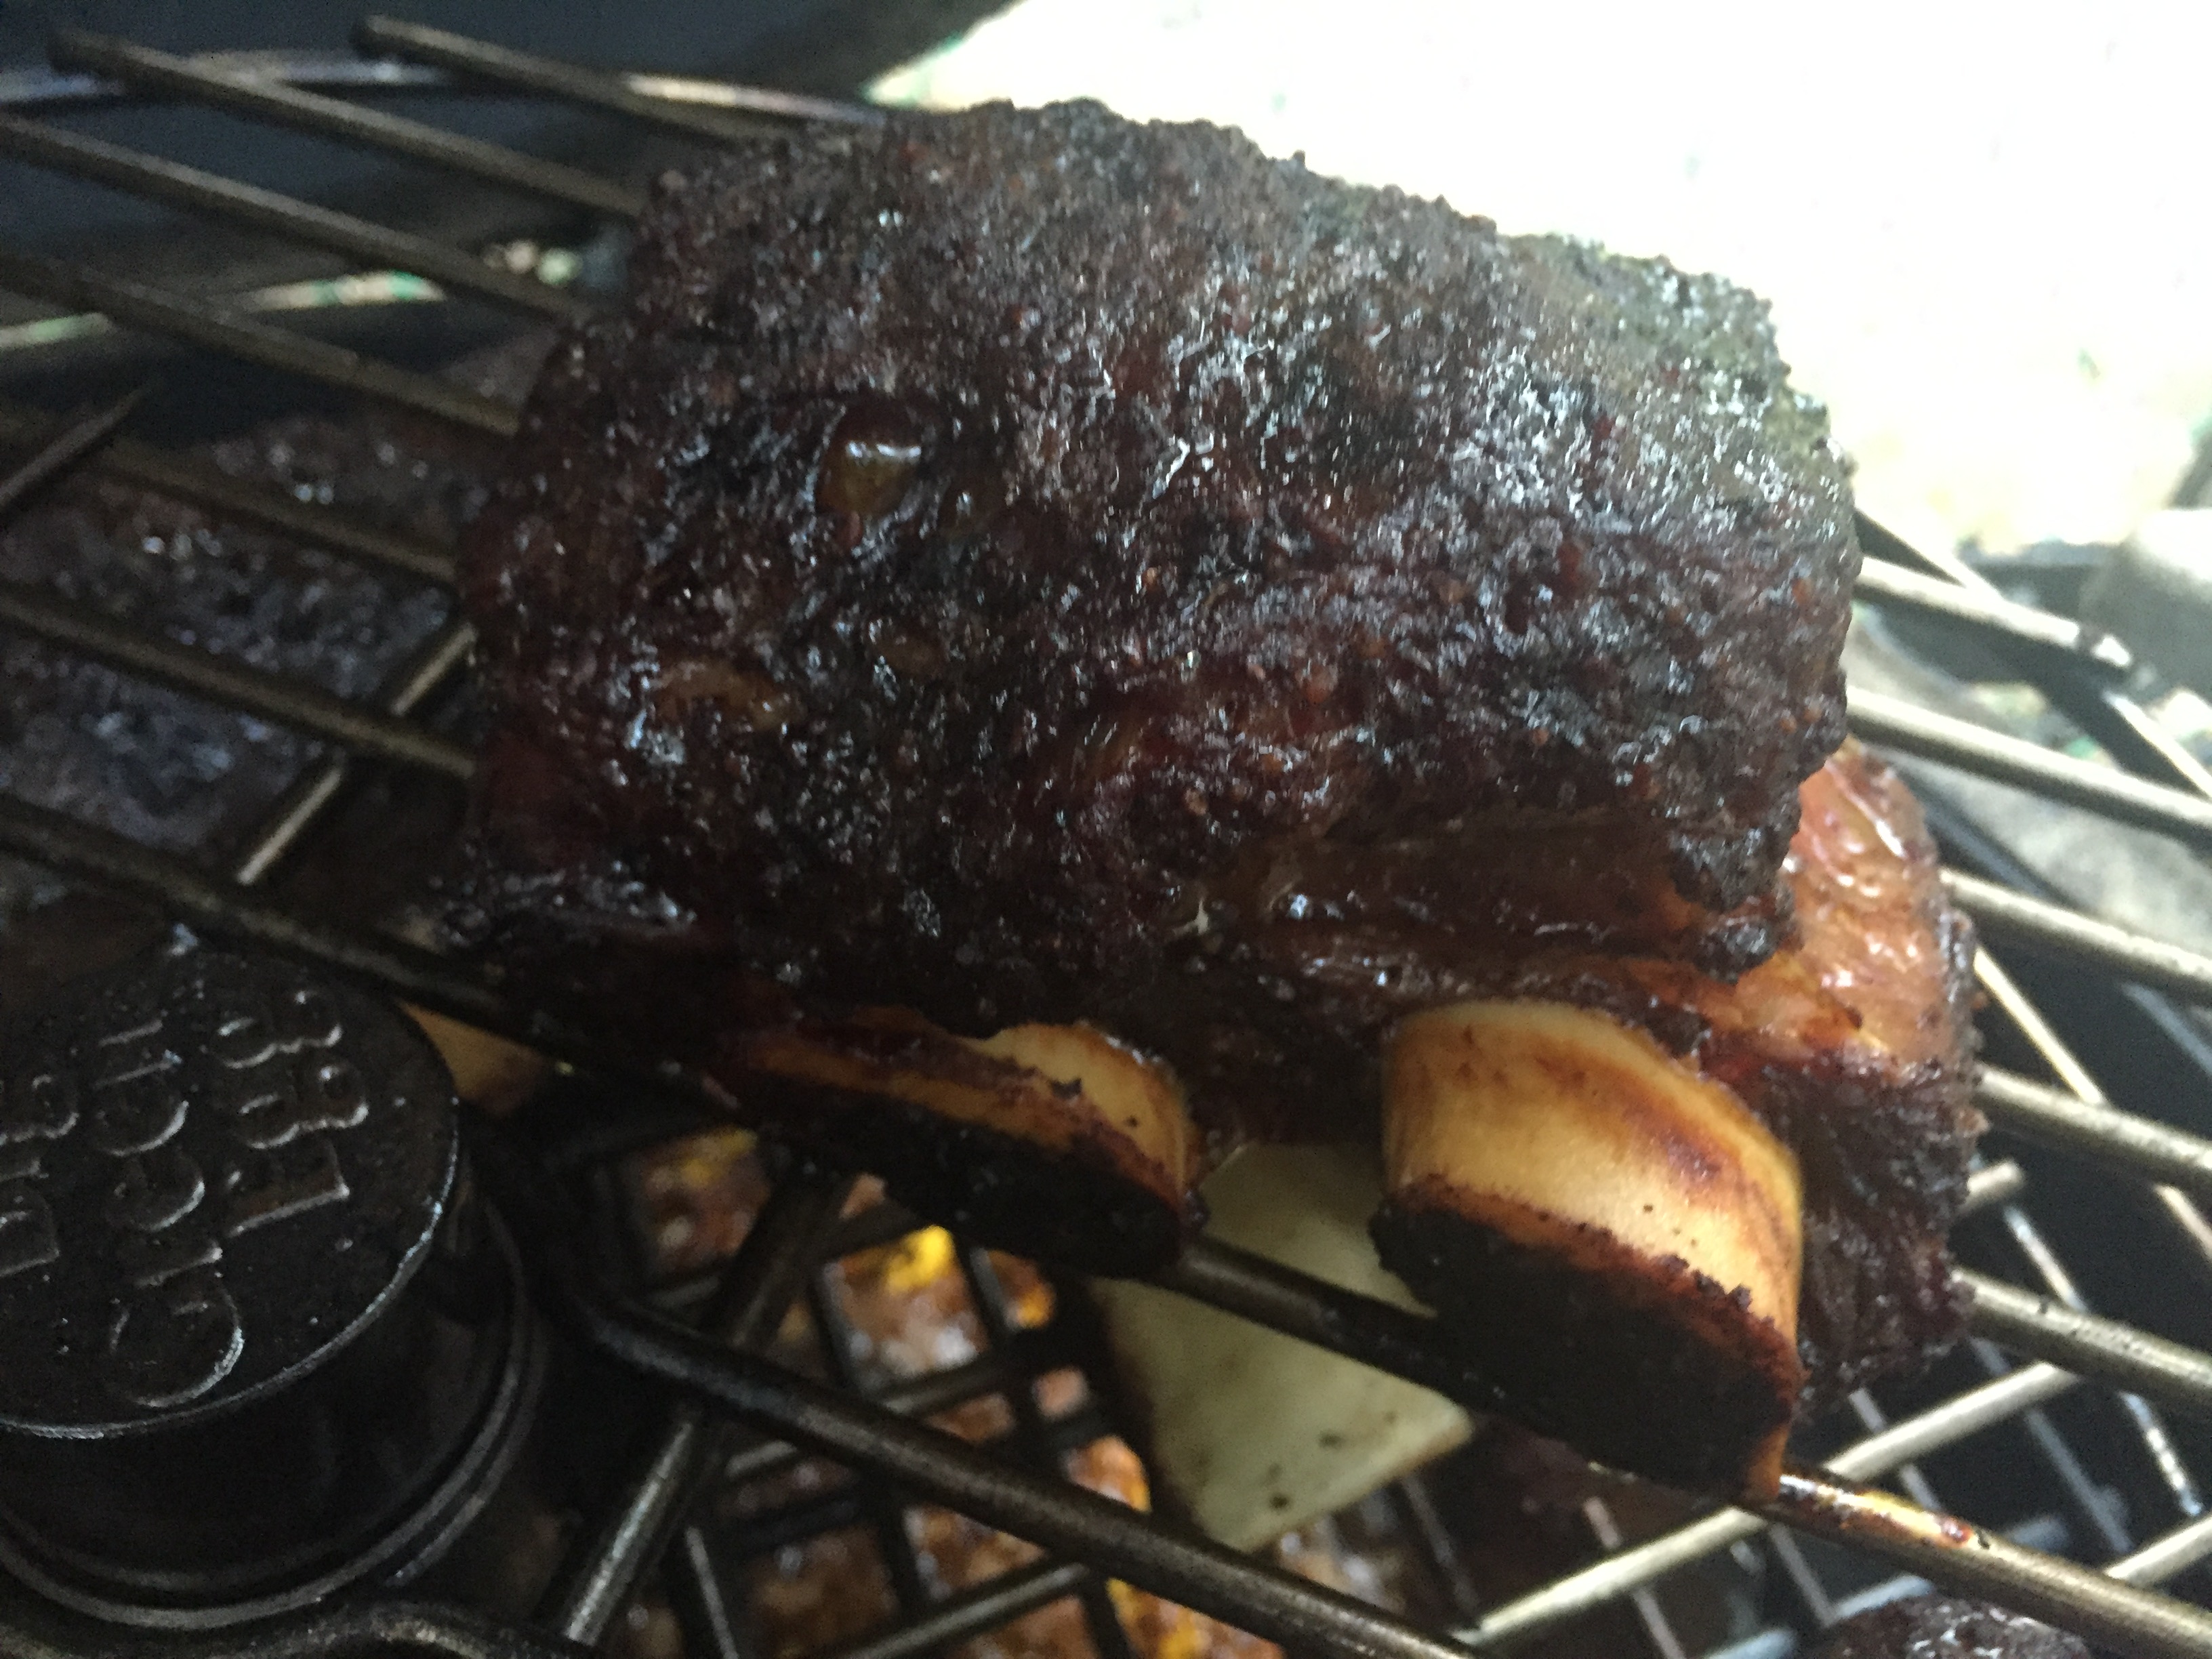
When you’re ready, cut the rib racks into 2-rib sections. Wet the ribs with plain tap water and then apply the rub EVERYWHERE! Set up your smoker for indirect heat and stabilise it at 225F (107C). I added a bit of cherry wood for smoke as a mesquite would be too powerful. You want the ribs to really stand out here. Too much smoke or the wrong type can really spoil this dish.


I used a two tier rack and placed a drip pan full of beef stock underneath the ribs. You want to catch all that lovely juice as it renders from the ribs. Gravy, baked beans, soup…you name, you can use it.
Place the ribs bone side down and insert a reliable thermometer probe into one of the thickest cuts. Make sure you’re not touching bone here or else you’ll get an inaccurate reading.
Let the smoking begin. Your target internal temperature will be just like a big beef brisket… the magic number of 203F (95C.) These ribs took just over 9 hours and were worth every minute of waiting time. Once you hit the magic temperature, remove them gently as the meat will literally slide off the bone. Let them rest for a bit because they’re hot…I mean nuclear hot. Then, skilfully slice the ribs off the bone and carve on an angle. Notice the smoke ring that forms after 9 hours! Gorgeous!
Serve em up with some of Roman’s “Fart Soup” (a recipe for another day) and call some good friends over.
Overall Heather Rating: 10/10

Bye Bye 2015…

Once again, Heather, Alex, Kalyna and I hosted friends from far and wide at our place to ring in the bells once again. And, as tradition would have it, we smoked two 8 lbs pork shoulders, some rib eye steak, smoked salmon, chile con carne and a whole heap of other things.
2015 was a good year but 2016 will surely be better. Thanks to everyone who made New Year’s Eve such a wonderful success.


Time to go vegetarian for a few days….or not.
A very special thank you to Mr Boon at Huber’s Butchery – he prepped the pork shoulder and was rewarded two days later with the LAST pulled pork sandwich. Thanks Ah Boon… you’re a legend!

What a find! Imperial Kamado

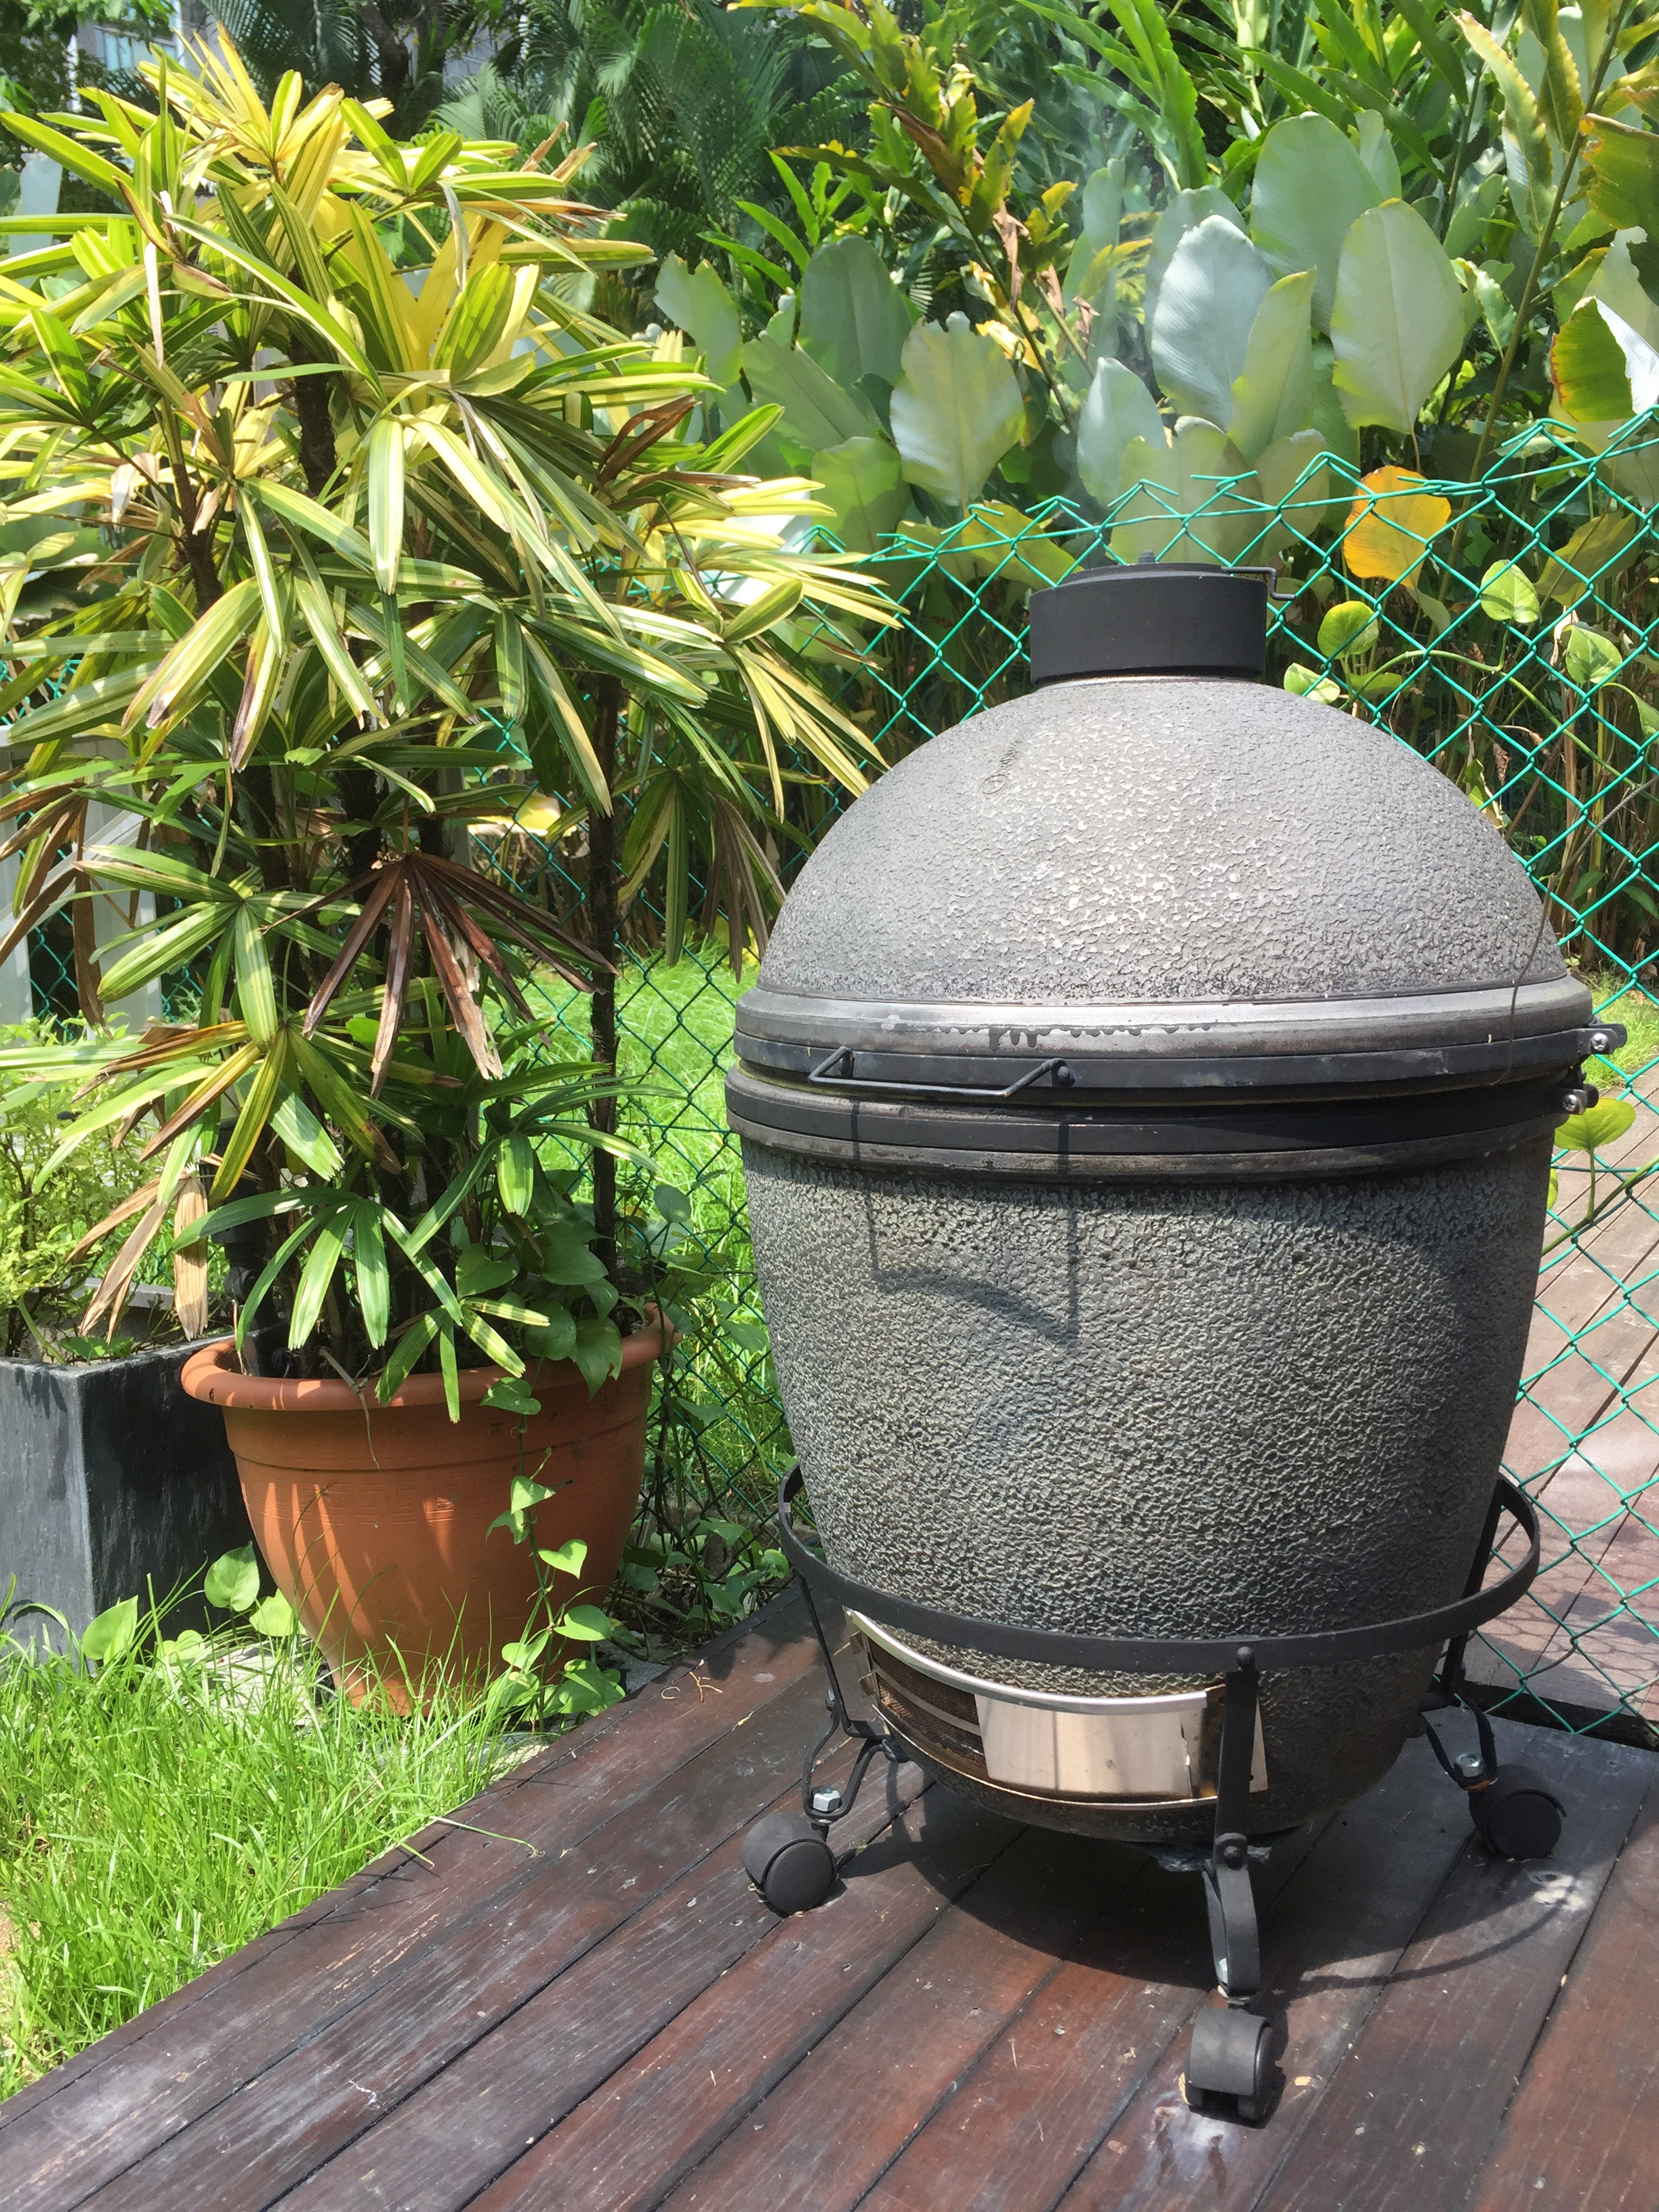
So a neighbour was throwing away “an egg” and of course I had to pounce on it, just in case it was a real egg. It turns out that what he was throwing away was in fact a Large Imperial Kamado. The great grandfather of the Big Green Egg… the original deal.
Now, when we picked it up (thank Alex) it barely opened and everything was rusted shut. Painstakingly, I took apart all the metal work, bought an angle grinder and went to work restoring this Kamado to it’s original beauty.
Some parts were not salvageable but the good thing is that parts from the Big Green Egg were adapted and fit with minimal fuss. A new firebox, fire ring and bottom damper was all it took.
I figure I put about $400 back into restoring this Kamado and it was worth every second! It works just as well as an egg, though it probably is slightly less efficient in terms of holding heat in. The difference is that the Imperial Kamado is made of earthenware vs the Big Green Egg which is ceramic.


Thanks for chucking away this piece of history neighbour!

Perfect Lamb Rack

So here’s the easiest way to roast a lamb rack and have it taste like you’ve just eaten at a 3 Michelin star restaurant.
The trick to perfecting your lamb is to remove the fat cap entirely. Admittedly, I used to keep it on hoping that it would render down. Not a chance. You need to carefully trim your rack so that almost no fat remains on the outside. If you keep it on, you’ll get a chewy, almost impossible hunk of lamb fat that quite honestly does much better once rendered down and kept in the fridge.
Once you’ve removed your fat cap, tie up the rack with some butcher’s twine and place the lamb into a large zip top bag and prepare a simple wet marinade of olive oil, 1 head of garlic, salt, pepper and four stems of finely chopped rosemary. Let that sit in the fridge for as long as you can, preferably over night.
As with most joints of meat, I like to reverse sear them. The technique is simple but it takes a bit of practice to get it perfect. Enjoy the fun of learning how to do this.
Get your grill up to 225F and set it up for indirect heat. Place the lamb rack on the grid and insert a trusty internal probe. I used a touch of wood (birch, this time) but only a little, like a quarter handful.
Allow the internal temperature of the lamb rack to come up to 120F – remove it and then coat the rack in olive oil. Set it aside and now fire up the grill by opening up the air baffle below, remove the plate setter and get it as hot as it will go. The secret is now in the sear, getting a beautiful rich brown caramelisation all over this rack. I used the back side of one of my Grill Grates, rested over the Mini Egg. This aircraft grade aluminium gets screaming hot, really fast. Now simply put your oiled rack on and keep flipping it every few minutes to ensure an even crust. Remove the lamb once it reaches 130F internal temperature.
Let the lamb rest for about 5 minutes. Cut off the butchers twine between the bones and slice between them. We served this rack of lamb with roasted red pepper salad and rosemary/garlic new potatoes.
As you can see by my daughter’s face, this was a winning dinner. I asked if I could finish her lamb and she shot me a look that could kill!
Overall Heather Rating: 10/10
Pork Roast, Filipino Style with Ginger Plum BBQ Sauce
 Sometimes its cool to take a recipe and adapt it for something entirely different. What we have here is meant to be a Filipino style rib recipe that I rearranged a bit to suit an entire pork roast. Recently we’ve been doing a lot around pork roast simply because they’re really versatile and easy to work with. So, I give you Pork Roast, Filipino style…
So first you’ll need to marinate the pork roast over night in the following marinade:
- 2/3 cup light soy sauce
- the juice and grated zest of 1 large orange
- the juice and grated zest of 1 large lemon
- the juice and grated zest of 1 large lime
- 2 stalks of fresh lemon grass, trimmed up and sliced thinly
- 1 tbsp fresh minced ginger
- 4 cloves minced garlic
Take all of the above ingredients and pulse them in a blender until it turns into a smooth puree. Take the pork roast and trim off all of the silver skin and excess fat then place it in a non-reactive bowl and pour the marinade over the roast. Close up the lid and let it sit over night. What you’ll get is an amazing citrus/garlic/ginger waft when you open the lid the next day that’s simply amazing!
Fast forward 24 hours, remove the pork roast from the marinade and discard it. Pat dry the roast but don’t bother rinsing it as you’ll want to keep some of that crazy taste in the marinade on the surface of the roast. Truss the roast between each of the ribs to make a uniform roast. This really helps with even cooking and it looks kind of nice as well! Now you’ll need to prepare the rub for the roast by combining the following in a shallow pan for the stove top:
- 1 tbsp sweet paprika
- 2 tsp regular black peppercorns
- 2 tsp coriander seeds
- 2 tsp cumin seeds
- 2 tsp mustard seeds
- 1 tsp fennel seeds
- 1 red chili pepper – thinly sliced and seeds included
Dry roast the spices and chili for about 3 minutes or so and stop just as they start to let off a bit of smoke and major smell. Let the spices cool down a bit and then put then all in your spice grinder. To the mix, add:
- 2 tsp light brown sugar
- 2 tsp Kosher salt
Grind up everything until its a fine powder. The smell in the kitchen will be outstanding at this point.
Now, coat your roast with a bit of vegetable oil and rub the spice mixture all over the roast, covering every spot possible, especially between the bones! Place the roast on a rack and let it sit in the fridge until you’re ready to get it on the grill. I let my roast sit in the fridge for another 6 hours which allowed the rub to penetrate the surface of the roast a little bit deeper.
When you’re ready set up your grill for direct heat at about 500F as you’re going to want to sear the exterior of the roast. Carefully sear all sides and try not to singe your fingers in the process. Solid tongs work well here. Once seared (5-8 minutes worth) remove the roast and place it in a v-rack over a drip pan. Add about 2 inches worth of beef stock to the drip pan and insert your thermometer into the centre of the roast. Add a handful of hickory chips to the fire, shut down the vents, add your place setter for indirect heat and finally put your drip pan, rack and roast on the grid. Close the dome and shoot to stabilise the external temperature to 300F with an internal roast temperature of 140F. Without peeking, this should take about 2 hours to reach your desired internal temperature.
Now, on to the bbq sauce! You’ll need the following ingredients:
- 6 big ripe plums, pitted and sliced in quarters
- 1 tbsp peeled, minced fresh ginger
- 1 stalk of fresh lemongrass, trimmed and finely chopped
- 1 hot red chili pepper (seeds included) finely chopped
- 2 green onions, finely chopped
- 2 cloves of fresh garlic, minced
- 3 tbsp light soy sauce
- 1 tbsp dark molasses
- 3 tbsp quality honey
- 1 tbsp rice wine vinegar
- the juice of 1 whole lemon
Combine all the ingredients in to a medium sized pot. Bring it all to a boil over medium heat and then let it reduce uncovered until the plums are super soft (about 20 minutes should do it!) Transfer the mixture once cool enough to a food processor and blend it all into a thick sauce. Taste it and adjust for balance with a bit more honey or lemon juice. Having said this, the proportions above yielded a perfectly balanced sweet, salty, tart and spicy sauce. Heather absolutely loved it! Set the sauce aside and it should stay warm enough to serve on the roast.
Back to the roast. Remove it when it hits an internal temperature of 140F and let it rest for about 10 minutes. Carve the roast between the bones and serve immediately. Heather prepared an amazing cheesy mash along with a simple garden salad. The result? A+++++ Its a slightly more complicated recipe but well worth all the effort. I’d like to encourage my new Egg brother Mr. Adam Shalaby from Toronto to try this recipe on his brand new Big Green Egg! Let us know how it goes Adam and welcome to the world of Eggness!
Overall Heather Rating: 10/10
Bacon Wrapped Bone-in Pork Roast

Holy moly, this was no doubt one of the best pork loin roasts we’ve done this year! Why? Bacon…that’s why! What goes better with pork? Well, more pork of course!!!! This recipe isn’t overly complicated it just takes a bit of time to get everything ready. Read on and find out just how good this roast really was!
First you’ll have to trim the silver skin off your roast and prepare your brine. You’ll brine the roast over night (or at minimum 6-12 hours) in a simple solution that goes something like this:
- 1 litre of pure Apple juice
- 1/2 cup of white sugar
- 1/2 cup of brown sugar
- 3/4 cup of sea salt
- a bundle of fresh thyme, sage and rosemary all wrapped up together
Dissolve the sugars and salt in the apple juice in a medium sized pot and then bring it to a simmer. Once it starts to gently bubble, remove it from the heat and add the herb bundle. Close the lid on the pot and let it cool down to room temperature. Once cooled, place the pork roast into a medium sized non-reactive bowl and pour the brine over the top. This should easily cover the entire roast. Pop it in the fridge over night (if possible.)
So once you’ve brined the roast, go ahead and prepare your herb rub by adding the following ingredients:
- 2 Tbsp Kosher salt
- 1 Tbsp freshly cracked black pepper
- 1 Tbsp of fresh thyme (finely chopped)
- 1 Tbsp of fresh rosemary (finely chopped)
- 1 Tbsp of fresh sage (finely chopped)
- 4 cloves of garlic, minced
Mix it all together and prep your roast. For that, simply rub some olive oil over the roast then pat the herb rub all over the top side of the roast. Now go set up your grill for direct heat (for now) as you need to sear the outside of the rack. Go ahead and get the grill to about 400F and carefully get some colour on it. Be gentle as you really don’t want the herb crust to fall off. Once you’ve got some nice colour (after about 10 minutes) remove the rack and get it back into the kitchen for the final…and most amazing step….the bacon!
Lay out enough rashers of bacon on a chopping block, slightly overlapping each other. Place your roast, meaty side down and then start wrapping the bacon around. I used toothpicks to temporarily hold everything in place before I trussed the roast with some butchers’ twine. Trussing it helps the roast cook evenly and it looks a little nicer when it’s all done. Lightly oil the top side of the roast (now covered in bacon) and sprinkle a bit of Kosher salt and freshly ground pepper.
Now, got back to your grill and set it up for indirect heat. For BGE owners, pop in the platesetter. I threw in a small handful of hickory chips as well just to help get some extra smokey flavour to adhere to the roast. Now, drop the temperature to about 280F and insert your trusty probe thermometer into the middle of roast. Place the roast onto a v-rack and over a drip pan containing about a cup of hot water. Drop the lid and don’t peek!
You’ll shoot for an internal temperature of 145F – that should take about 90-120 minutes. Remove the roast and let it rest for about 10 minutes. Sharpen your knife and cut the butcher’s twine first then cut the roast into individual chop portions. We served the pork with homemade cinnamon apple sauce and a purple cabbage and feta salad. Absolutely delicious and something I’ll do again and again!
Enjoy!
Chicken Shashlyky (Kebabs)
 Happy weekend everyone! Heather, the kids and I decided that after a crazy holiday season of eating, drinking and more of the same times 1,000…we needed to turn up the healthier options for the foreseeable future. So, in the spirit of healthy eating, last nights’ dinner was simple, tasty, healthy and inexpensive to prepare…Chicken Shashlyky (Ukrainian for “kebabs.”)
Here’s what you’ll need:
- 2 chicken breasts, butterflied and cut into “cubes” of equal size and thickness
- 1 red pepper, 1 green pepper, 1 yellow pepper – quartered and sliced on the half
- 12 cherry tomatoes
- 12 small brown mushrooms, halved
- 2 red onions, peeled, halved and quartered and picked apart
- a few good glugs of olive oil
- Old Bay seasoning
- Freshly cracked black pepper and a little bit of Kosher salt
- 2 bricks wrapped in aluminium foil (you won’t eat these but they help tremendously!!!)
In a bowl, prepare your chicken cubes and douse them with some olive oil and coat with a light dusting of Old Bay spice seasoning. Next after you’ve sliced, diced and prepared your vegetables, put them in a deep bowl, pour a few glugs of olive oil and season with salt and pepper – easy on the salt as the Old Bay is pretty salty.
Now grab your metal skewers and lube them up with a bit of oil. Spear your vegetables and chicken in any fashion you like. Make it look pretty, alternating colours and vegetables. Now all the while you should have had your grill set up for direct heat stabilised between 450-500F. Wrap your bricks in the aluminium foil and place them on the grid as far apart as possible. You’ll end up laying the skewers across the bricks, keeping the Shashlyky off the grid which prevents sticking. The other benefit of the bricks is it’s really easy to turn the skewers every 5 minutes by simply twisting the end loop.
Place your Shashlyky on between the bricks, crack a bit of fresh pepper on them and close the dome and then come back every 5-7 minutes and flip the skewers. Do this about three times for a maximum cooking time of about 15-18 minutes. A quick read thermometer also helps and you know your done when the vegetables have a nice slight char and the chicken has reached an internal temperature of 165F.
Serve up the Shashlyky with a little bit of couscous and you’re done! (Got and 8 because Heather seems to think we needed a dipping sauce… Any and all suggestions are welcome!)
Overall Heather Rating: 8/10
